Disassembly
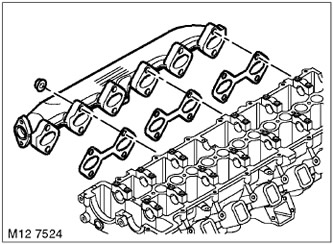
1. Turn away 12 nuts of fastening of a final collector, remove a collector and utilize a lining.
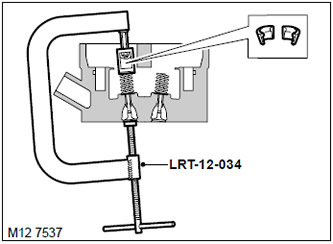
2. Install the LRT-12-034 cracker on the valve disc and compress the valve spring.
3. Take out 2 crackers and remove the cracker.
4. Take out a valvate spring with a plate.
5. Remove the valve from the cylinder head.
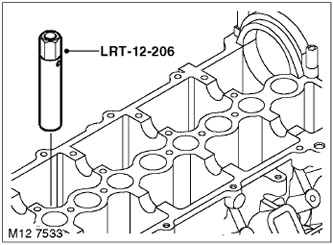
6. Install the LRT-12-206 cap remover on the valve stem seal, turn to engage the cap and remove the cap.
7. Do the same on the remaining valves, laying out the removed parts in the order in which they were on the cylinder head.
Examination
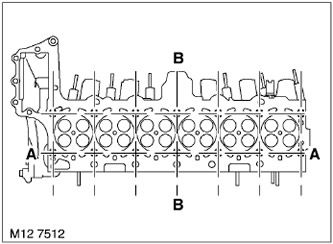
1. Using a straightedge and a feeler gauge, check the deformation of the bottom plane of the head in the directions shown in the figure.
2. Clean and check valve seats.
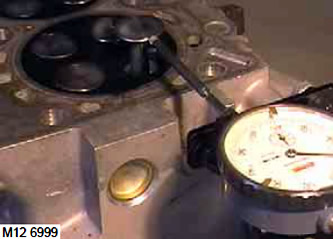
3. Insert the new valve into the guide so that the top of the valve stem is on the cut of the guide sleeve.
4. Install a pointer indicator on the cylinder head and set "zero" indicator, resting its leg on the valve plate. By shaking the valve sideways, determine the degree of wear of the valve guide.
TECHNICAL DATA, Engine - Td6.
Assembly
1. Remove carbon deposits from guide bushings and inlet passages, blow with compressed air.
2. Wipe the valve, spring plate and crackers.
3. Lubricate the valve with clean engine oil and insert it into the guide.
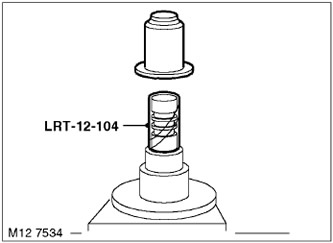
4. Install the LRT-12-104 tool on the valve stem, put on a new valve stem seal and remove the LRT-12-104 tool. Push the cap all the way onto the valve guide by pushing it in with the LRT-12-207 tool.
5. Install valve spring with poppet.
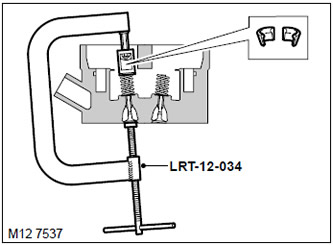
6. Use the LRT-12-034 dryer to compress the valve spring. Put on crackers and carefully release the spring.
7. Do the same for the remaining valves.
8. Wipe the exhaust manifold and mating surface on the cylinder head.
9. Install the exhaust manifold to the cylinder head using a new gasket.
10. Screw in bolts of fastening of a final collector and tighten them. Tightening torque 24 Nm.
Comments on this article