Removing
1. Disconnect "mass" battery wire.
2. Remove the plastic fender liner of the right rear wheel.
EXTERIOR PARTS, REPAIR WORKS, Rear wheel arch liner.

3. Disconnect the fuel tank leak control connector.
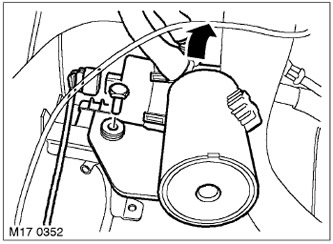
4. Turn away a bolt of fastening of the block of control of tightness, disconnect fastening brackets.

5. Slide the leak control unit so that it is under the fuel filler neck. Remove and discard the absorber hose clamp to the leak control unit.
CAUTION: Before disconnecting any part of the fuel system, thoroughly clean the surrounding area of dirt, dust and deposits to prevent foreign particles from entering the system.
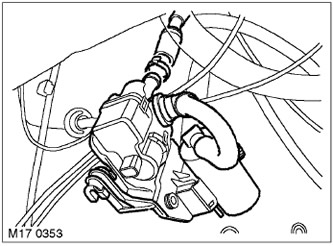
6. Disconnect the absorber hose and remove the leak control unit.
7. Close all openings with plugs.
NOTE: If disassembly was carried out only to provide access to other elements of the system, then further disassembly operations should not be performed.
8. Remove the air filter tube from the leak tester fitting.
9. Remove the 3 Torx screws securing the leak control box to the bracket and remove the box.
Installation
1. Place the leak tester on the bracket and fasten it with screws. Connect the air filter hose to the leak control unit.
2. Connect the absorber air hose to the leak control unit and secure it with a new clamp.
3. Align the hole in the body with the hole in the bracket of the leakage control unit, wrap and tighten the mounting bolt to a torque of 10 Nm.
4. Connect the connector to the leak control unit.
5. Establish a plastic liner of the right back wheel.
EXTERIOR PARTS, REPAIR WORKS, Rear wheel arch liner.
6. Connect " mass" battery wire.
Comments on this article