GENERAL INFORMATION, Precautions when working with electrical equipment.
Dismantling
1. Put the car on a lift.
2. Disconnect "negative" battery terminal.
3. Remove the lower protective cover.
EXTERIOR PARTS, REPAIR WORKS, Engine protection - front.
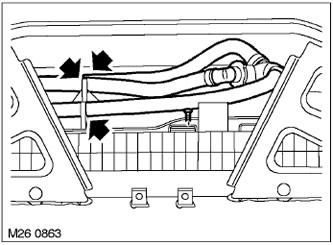
4. Disconnect 3 hoses of system of cooling from collars on a casing of the fan. Remove the screw that secures the fan shroud to the radiator.
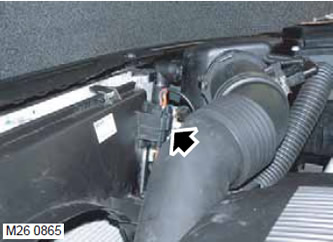
5. Disconnect the fan electrical connector and remove it from the mounting on the fan shroud.
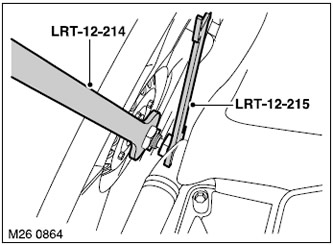
6. Using tools LRT-12-214 and LRT-12-215, loosen the nut securing the viscous coupling and remove it complete with the fan from the cooling system pump shaft.
NOTE: This thread is left handed.
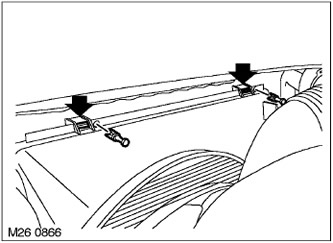
7. Remove the fan shroud fasteners.
ATTENTION: The core of the radiator is easily vulnerable. Do not allow the frame to be damaged by the fan or fan shroud.
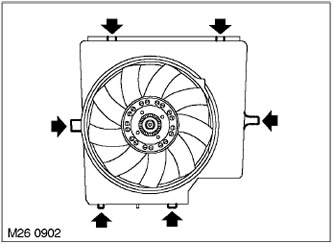
8. Release the fan shroud from the supports and remove it together with the fan.
9. Place the viscous fan on the workbench.
NOTE: If disassembly was carried out only to provide access to other elements of the system, then further disassembly operations should not be performed.
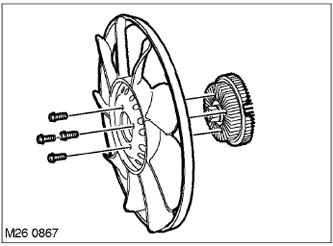
10. Turn away 4 bolts and remove the fan from a viscous coupling.
Assembly
1. Wipe the mating surfaces of the fan and coupling.
2. Put the fan on the viscous coupling and tighten the 4 bolts. Tightening torque 10 Nm.
3. Carefully reinstall the fan and shroud and secure the shroud to the supports.
4. Install the fan with clutch onto the coolant pump shaft. Using tools LRT-12-214 and LRT-12-215, tighten the viscous clutch nut. Tightening torque 45 Nm.
5. Install the auxiliary cooling fan connector into the fan shroud.
6. Replace the screw that secures the fan shroud to the heatsink.
7. Fasten 3 hoses of system of cooling in a collar on a casing of the fan.
8. Replace the bottom guard.
EXTERIOR PARTS, REPAIR WORKS, Engine protection - front.
9. Attach "negative" battery terminal.
Comments on this article