GENERAL INFORMATION, Precautions when working with electrical equipment.
Dismantling
1. Put the car on a lift.
2. Disconnect the negative plug from the storage battery.
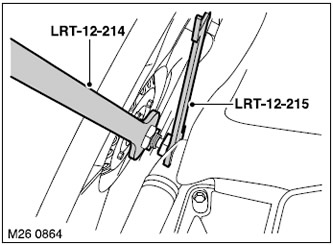
3. Using tools LRT-12-214 and LRT-12-215, loosen the nut securing the viscous coupling and remove it complete with the fan from the cooling system pump shaft.
NOTE: This thread is left handed.
4. Remove the air tube.
HEATING AND VENTILATION, REPAIR WORKS, Air intake box.
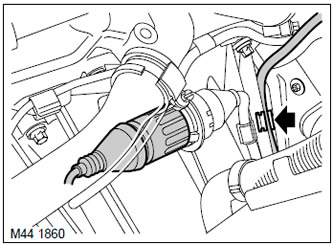
5. Disconnect the block from the lock switch connector.
6. Release the left oxygen sensor cable retainers to the automatic transmission case.
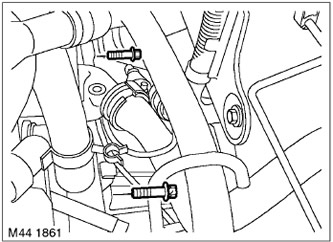
7. Turn out two top screws like Torx fastenings of a case of automatic transmission.
8. Raise the vehicle on a lift.
9. Remove the rear driveshaft.
DRIVE SHAFTS, REPAIR WORKS, Cardan shaft - rear.
10. Remove the front propeller shaft.
DRIVE SHAFTS, REPAIR WORKS, Cardan shaft - front.

11. Turn away 5 nuts and remove the right thermal screen.
12. Drain the working fluid from the automatic transmission crankcase.
AUTOMATIC TRANSMISSION - ZF 5HP24, ADJUSTMENTS, Automatic transmission fluid - drain and fill.

13. Using LRT-44-032, support the automatic transmission on a jack. The arrow in the figure points towards the front of the vehicle.

14. Remove the bolt and nut connecting the transmission support assembly to the cross frame.
15. Turn out 6 screws of fastening of a cross frame and remove a cross frame.
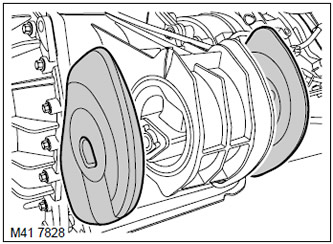
16. Remove the silent blocks from the support.
17. Lower the gearbox on the jack.
WARNING: Do not let the transmission hang on the selector cable.

18. Remove the block from the connector of the transfer case shift drive assembly.

19. Disconnect the block from the connector of the automatic transmission.
20. Disconnect the clamps securing the oxygen sensor cables to the transfer case.

21. Turn away a nut of fastening of the selector lever to a shaft of the selector of a transmission and remove the selector lever.

22. Turn out two screws of a lath of fastening of a cable of the selector to a transmission and fix a cable aside.

23. Turn out the screw of fastening of the gauge of position of a cranked shaft, remove the gauge and place it aside.
24. Remove the right oxygen sensor cable from the automatic transmission case.
25. Remove the protective shield.
EXTERIOR PARTS, REPAIR WORKS, Engine protection - front.
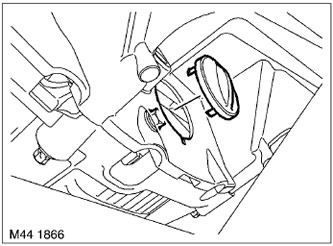
26. Remove the plug from the torque converter housing to gain access to the torque converter mounting screws.
27. Turning the engine shaft, open access to the four screws securing the drive flange to the torque converter and remove them.

28. Turn out two screws of fastening of a starter and fix a starter aside.

29. Turn out the screw of fastening of a clip of pipelines of a cooler to the pallet of an automatic transmission.

30. Turn out a bolt of fastening of a tip of the pipeline of a cooler to the left side of a case of automatic transmission and throw out sealing linings.
31. Remove the cooler line from the right side of the automatic transmission case and discard the O-ring.

32. Turn out 8 screws like Torx fastenings of a case of automatic transmission.
33. With the help of an assistant, carefully remove the automatic transmission assembly from the engine. The torque converter must remain with the automatic transmission.

34. Install the torque converter fixing plate and secure with screws.
Assembly
1. Clean all mating surfaces.
2. Remove the torque converter fixing plate.
3. With the help of a second person, carefully install the automatic transmission assembly onto the engine. Ensure that the centering parts of the torque converter and the automatic transmission case match.
4. Install 8 Torx type screws securing the automatic transmission to the engine and tighten them to 45 Nm.
5. Wipe the ends of the cooler pipes and the surfaces of the crankcase mating with them.
6. Install the cooler line on the left side of the automatic transmission case.
7. Lubricate the new gaskets with working fluid, wrap the pipe fastening screw and tighten it with a torque of 37 Nm.
8. Install a new sealing ring on the end of the cooler pipeline, attach the pipeline to the automatic transmission case and tighten the fastening nut with a torque of 37 Nm.
9. Install the clamp of the cooler pipelines, wrap the screw and tighten it with a torque of 6 Nm.
10. Install the starter, tighten the mounting screws and tighten them with a torque of 45 Nm.
11. Wrap screws of fastening of the hydrotransformer to a leading flange and tighten them with the moment of 45 Нм.
12. Install the plug on the converter housing.
13. Replace the protective shield.
EXTERIOR PARTS, REPAIR WORKS, Engine protection - front.
14. Attach the oxygen sensor cables to the automatic transmission housing.
15. Clean the motor shaft position sensor and mating surface.
16. Install the motor shaft position sensor in place, tighten the fastening screw and tighten it with a torque of 6 Nm.
17. Establish a level of fastening of a cable of the selector on a case of a transmission, wrap screws and tighten them with the moment of 10 Н·м.
18. Connect the selector lever to the lock switch, tighten the nut and tighten it with a torque of 10 Nm.
19. Install and secure the clamps securing the oxygen sensor cables to the transfer case.
20. Attach a block to a socket of an automatic transmission.
21. Attach the block to the connector of the transfer case shift drive assembly.
22. Jack up the gearbox.
23. Install silent blocks.
24. Connect the cross frame to the support, install the bolt and nut, but do not fully tighten them.
25. Install the transverse frame, tighten the fastening screws and tighten them with a torque of 68 Nm.
26. Remove the jack from under the gearbox.
27. Tighten the nut and bolt securing the support to the transverse frame with a torque of 100 Nm.
28. Install the heat shield and tighten its nuts.
29. Install the rear driveshaft.
DRIVE SHAFTS, REPAIR WORKS, Cardan shaft - rear.
30. Reinstall the front propeller shaft.
DRIVE SHAFTS, REPAIR WORKS, Cardan shaft - front.
31. Lower the car.
32. Wrap the two upper Torx type screws securing the automatic transmission housing and tighten them with a torque of 25 Nm.
33. Install and secure the left oxygen sensor cable retainers to the automatic transmission case.
34. Connect the pads to the lock switch connector.
35. Replace the air tube.
HEATING AND VENTILATION, REPAIR WORKS, Air intake box.
36. Install the fan on the pulley and tighten the viscous coupling fastening nut with a torque of 40 Nm.
37. Connect the negative terminal to the battery.
38. Fill in a working liquid in automatic transmission.
AUTOMATIC TRANSMISSION - ZF 5HP24, ADJUSTMENTS, Automatic transmission fluid - drain and fill.
Comments on this article