GENERAL INFORMATION, Precautions when working with electrical equipment.
Dismantling
1. Disconnect "negative" battery terminal.
2. Remove the front bumper.
EXTERIOR PARTS, REPAIR WORKS, Front bumper assembly.
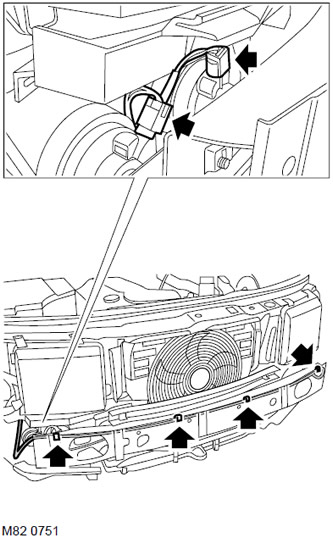
3. Release the 4 flexible clips securing the washer hose to the body and move the hose to the side.
4. Disconnect the horn block.
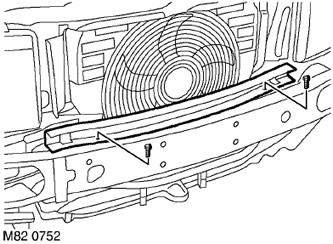
5. Turn out two screws of fastening of an overlay of a bumper beam and remove an overlay from a bumper beam.
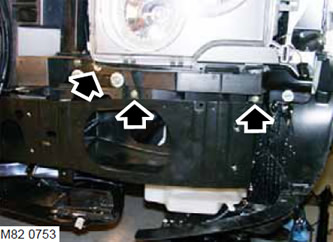
6. Turn out 3 screws of fastening of the left support of a bumper. Repeat the operation for the right support and remove it.
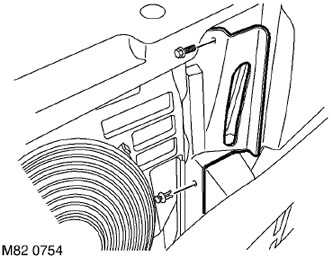
7. Remove the screw and remove the left air deflector retainer, repeat the operation for the right deflector. Remove deflectors.
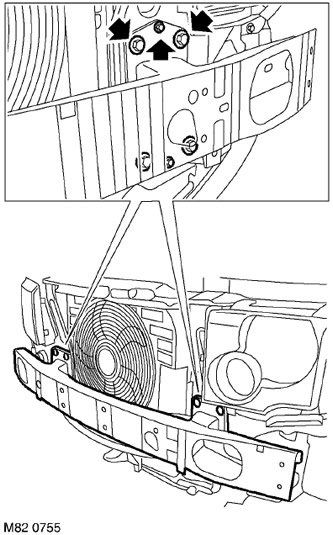
8. Turn away 8 nuts and 4 screws of fastening of a beam of a bumper. Cut off the 2 plastic ties and, after releasing the engine wiring harness, remove the bumper beam.
NOTE: If disassembly was carried out only to provide access to other elements of the system, then further disassembly operations should not be performed.
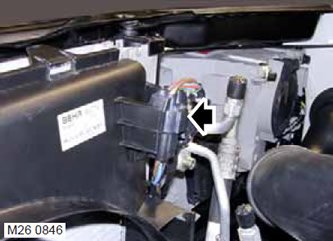
9. Disconnect the connector from the condenser fan motor connector.
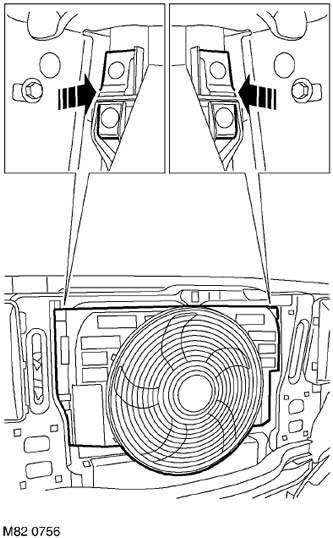
10. Press the spring clips and remove the condenser fan shroud.
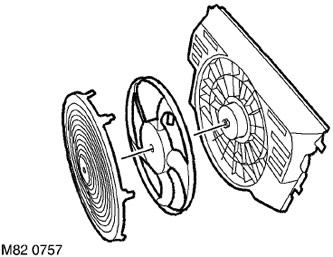
11. Press the 7 spring clips securing the fan grille and remove the grille from the fan shroud.
12. While holding the fan assembly, turn the nut counterclockwise and remove the fan from the motor shaft.
13. Separate the motor cable from the condenser fan shroud.
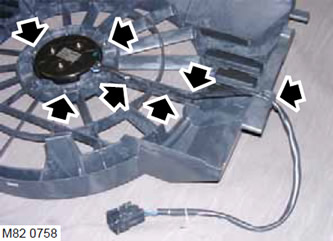
14. Remove the 3 Torx screws securing the fan motor to the shroud and remove the motor.
Assembly
1. Place the fan/motor assembly on the fan grille, install the screws and tighten them to 5 Nm.
2. Attach the fan motor cable to the clips on the fan grille.
3. Mount the fan on the motor shaft, making sure the ribs match up. While holding the fan, turn the central fan mounting nut clockwise.
4. Replace the fan grille and fasten the fasteners.
5. Replace the condenser fan shroud and secure the latches.
6. Connect the shoe to the fan motor.
7. Install the bumper beam on the body, tighten the screws and nuts and tighten the screws with a torque of 10 Nm, and the nuts with a torque of 45 Nm.
8. Secure the cables with flexible clamps.
9. Install and secure the bumper mounting brackets and tighten the screws with a torque of 3 Nm, install the clamps.
10. Install and secure fan air deflectors.
11. Install and secure the bumper beam extension.
12. Attach blocks of sockets of a sound signal.
13. Position the washer hose on the bumper beam and secure it with new clips.
14. Reinstall the front bumper.
EXTERIOR PARTS, REPAIR WORKS, Front bumper assembly.
15. Attach "negative" battery terminal.
Comments on this article