Do not release air from the air suspension system until the vehicle is raised.
When disconnecting the Voss fitting from any air suspension element, it must not be removed from the detachable air hose.
Do not remove the fitting from the air hose. When removing the fitting from the hose, there is a high chance of scratching it, which can later lead to air leakage and from the system.
Dismantling
1. Raise the rear of the vehicle and jack it up.
WARNING: Do not work under a vehicle raised only on a jack or lift. Always install safety props.
2. Remove the wheel.

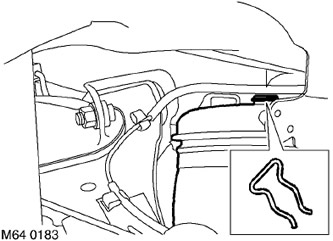
3. Remove the clamp from the top support of the air element.

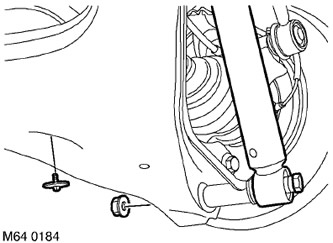
4. Turn away the screw of fastening of an air element to the bottom lever.
5. Bleed air from the air element being replaced.
REAR SUSPENSION, ADJUSTMENTS, Pneumatic suspension - air release and filling the system with air.
6. Turn away a bolt of fastening of the shock-absorber to the bottom lever.
7. Disconnect the shock absorber from the lower arm.
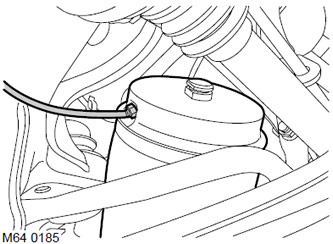
8. Together with a partner, lower the lower suspension arm and release the pneumatic element to access the fitting located on the air hose.
CAUTION: Do not deform the air element - do not stretch it or compress it.

9. Disconnect the air hose.
CAUTION: Before disconnecting or removing system components, make sure that the surfaces adjacent to the connection points are free of dirt. Install plugs in fittings and piping to keep dirt out of the system.
10. Remove the air element assembly.
Assembly
1. If a new air element is being installed, then remove the air fitting from it.
CAUTION: Inspect the air element for damage. If the pneumatic element is damaged, it must be replaced.
2. Install the air element assembly, connect the air hose, but do not tighten the connection yet.
CAUTION: Clean the air hose connection.

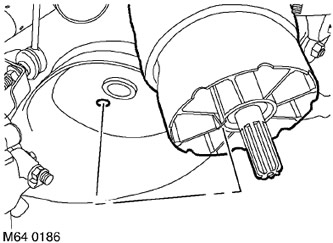
3. Together with a partner, install the air element on the lower arm, turning the air element so that the mounting shoulder is in the correct position.
CAUTION: Do not deform the air element - do not stretch it or compress it.
4. Tighten the air hose fitting to 3.5 Nm (2.6 lb ft).
5. Tighten the screw securing the pneumatic element to the lower arm with a torque of 7 Nm (5 lb ft).
6. Align the shock absorber with the lower arm, install the mounting bolt and tighten it with a torque of 110 Nm (81 lb ft).
7. Pressurize the circuit to secure the upper air cell support. Install the clamp.
8. Bring the pressure in the air suspension system to the nominal value.
REAR SUSPENSION, ADJUSTMENTS, Pneumatic suspension - air release and filling the system with air.
ATTENTION: Before removing the prop and placing the vehicle on the wheels, it is necessary to bring the pressure in the air suspension system to the nominal value.
9. Replace the wheel (wheels) and tighten the nuts with a torque of 140 Nm (103 lb ft).
10. Remove props and lower the car.
Comments on this article