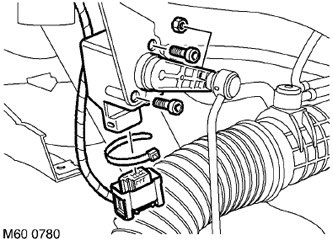
Dismantling
1. Raise the front of the car.
WARNING: Do not work under a vehicle raised only on a jack or lift. Always install safety props.
2. Remove the wheel.

3. Remove the cable tie and disconnect the multi-pin electrical connector.
4. Turn away a nut and disconnect draft from the gauge.
CAUTION: Use a socket wrench to prevent rotation of the ball joint.
5. Using a 4mm Allen socket, remove the two screws securing the body height sensor to the mounting bracket and remove the sensor.
Assembly
1. Clean the mating surfaces of the transducer and mounting bracket from dirt.
2. Align the body height sensor with the mounting bracket, install the Allen type screws and tighten them to 5 Nm (3.7 lb ft).
3. Connect the rod to the body height sensor and tighten the nut with a torque of 8 Nm (6 lb ft).
CAUTION: Make sure the sensor arm is facing out.
4. Plug in the multi-pin electrical connector and secure the cable with the cable tie, taking care not to overstretch the electrical wires so that they do not press on the connector.
WARNING: Make sure the O-ring is correctly seated on the multi-pin connector.
5. Reinstall the wheel and tighten the nuts to 140 Nm (103 lb ft).
6. Remove props and lower the car.
7. If the sensor is replaced, tune the air suspension system using the TestBook/T4 diagnostic tool.
FRONT SUSPENSION, ADJUSTMENTS, Adjusting the air suspension system.
Comments on this article