When disconnecting the Voss fitting from any air suspension element, it must not be removed from the detachable air hose. Do not remove the fitting from the air hose. When removing the fitting from the hose, there is a high chance of scratching it, which can later lead to air leakage from the system.
Dismantling
1. Raise the front of the vehicle and jack it up.
WARNING: Do not work under a vehicle raised only on a jack or lift. Always install safety props.
2. Remove pressure regulator assembly.
FRONT SUSPENSION, REPAIR WORKS, Pressure regulator assembly.

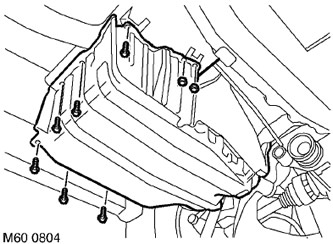
3. To provide access to the receiver, unscrew the 6 bolts and 2 nuts securing the fuel tank screen and the lower screen.

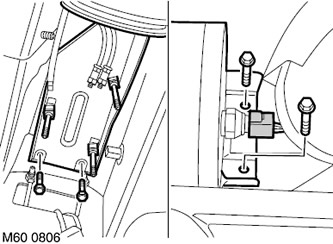
4. Turn away 4 bolts of fastening of a receiver and disconnect a multicontact electric socket from the gauge of pressure.
CAUTION: Do not remove the pressure transducer from the receiver.

5. Remove the two air hose clamps and disconnect the receiver.
NOTE: Do not further disassemble if a component is being removed only for ease of access.
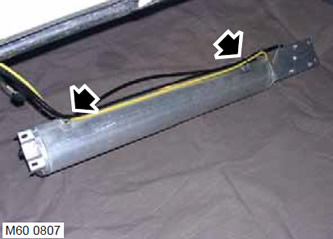
6. Turn away nuts of fastening of hairpins of a pressure regulator and then turn away hairpins.
Assembly
1. Install pressure regulator studs and tighten nuts.
CAUTION: Make sure the rubber seals are in the correct position in the recesses in the pressure regulator housing.
2. If installing a new receiver, remove the air fitting from the new assembly.
3. Install the receiver, fix the air hoses and connect the multi-pin electrical connector.
CAUTION: Be careful not to snag the hoses on the receiver brackets.
4. Wrap the bolts securing the receiver to the body and tighten them with a torque of 8 Nm (6 lb ft).
5. Install the fuel tank screen bolts and nuts and tighten them to 25 Nm (18 lb ft).
6. Install pressure regulator.
FRONT SUSPENSION, REPAIR WORKS, Pressure regulator assembly.
7. Remove props and lower the car.
Comments on this article