NOTE: The valve cover and cylinder head are machined as an assembly and cannot be serviced separately.
Removing
1. Remove the cover and disconnect the ground wire from the battery. Refer to procedure: Specifications (414-00 Charging system - General information, Specifications).
2. Raise the vehicle.
WARNING: Place secure stands under the vehicle.
3. Remove the exhaust manifold. Refer to Procedure: Exhaust Manifold (303-01B Engine - 2.2L Duratorq - Td4, Removal and installation).
4. Remove camshafts. Refer to Procedure: Camshafts (303-01B Engine - 2.2L Duratorq - Td4, Removal and installation).
5. Remove the thermostat. Refer to Procedure: Thermostat (303-03B Engine cooling - 2.2L Duratorq - Td4, Removal and installation).
6. Remove the right engine mount. Refer to Procedure: Right Engine Mount (303-01B Engine - 2.2L Duratorq - Td4, Removal and installation).
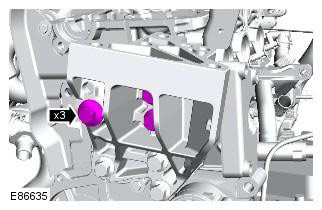
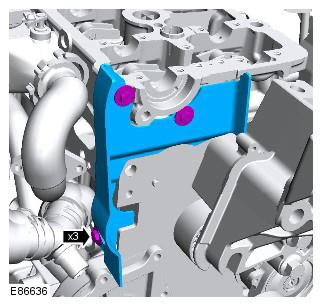
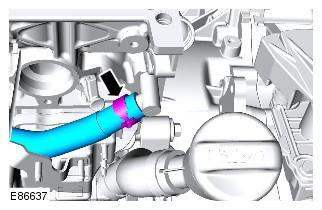
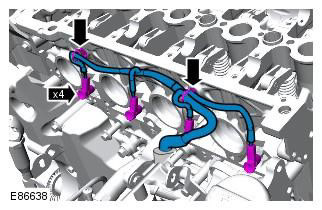
7.
CAUTION: Note the installation location of the elements before removal.
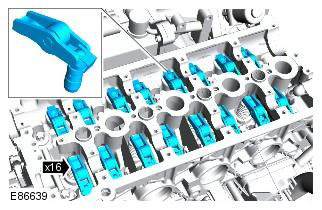
8. Discard bolts.
WARNING: This step requires the assistance of a second mechanic.
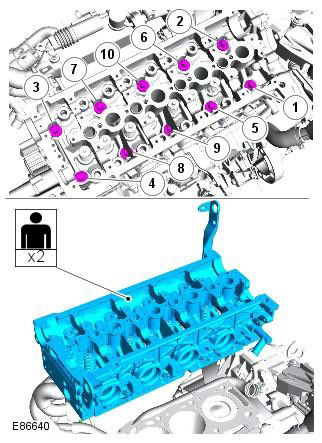
9.
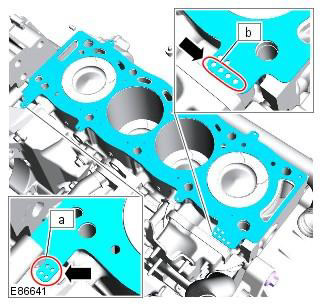
Note the thickness of the removed gasket. The thickness of the gasket is determined by the number of holes (1 to 4) at any of the locations shown.
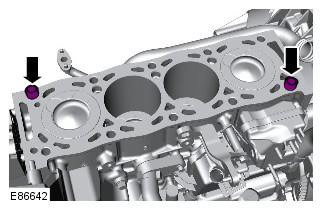
10.
NOTE: Do not proceed with disassembly if the element is being removed only to gain access.
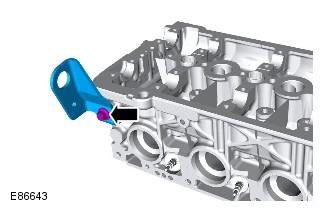
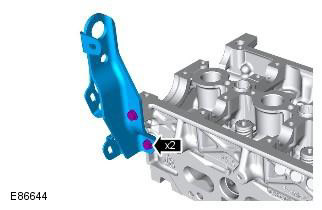
Installation
1. Install lifting brackets and tighten bolts. Tightening torque: 10 Nm
2. Clean and inspect the cylinder head and cylinder block.
CAUTION: Clean off the old gasket only with a plastic scraper.
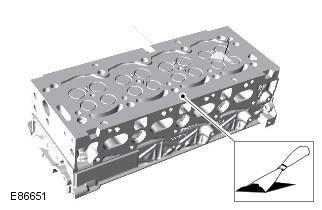
3. Check up a surface of a head of cylinders regarding roughnesses in the central part and on corners. Refer to procedure: Specifications (303-01B Engine - 2.2L Duratorq - Td4, Specifications).
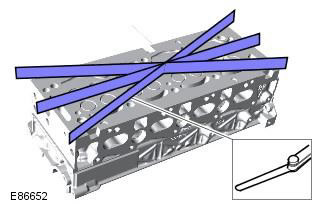
4. If necessary, select the correct thickness cylinder head gasket. Refer to procedure: Head Gasket Selective Selection - 2.2L Duratorq - Td4 (303-00 Engine - General information, General procedures).
5. Install a new cylinder head gasket.
Clean mating surfaces of foreign material. Make sure the dowel pins are installed correctly. Be sure to install the correct thickness gasket. Make sure the gasket is installed correctly.
6. Install the cylinder head.
WARNING: This step requires the assistance of a second mechanic.
CAUTION: Position the element correctly on the dowel pins.
7. Tighten the cylinder head bolts in this order in three steps. Tightening torque: Stage 1: 20 Nm. Stage 2: 60 Nm. Stage 3: 220°
CAUTION: Use new cylinder head bolts.
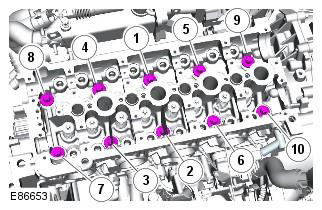
8. Install valve levers.
Clean mating surfaces of foreign material. Lubricate the bearing surfaces with clean engine oil. These elements should be installed in the original position marked during removal.
9. Connect the electrical connectors for the glow plugs and secure the harness to the cylinder head.
10. Attach and fix a hose of system of cooling.
11. Install the rear timing belt cover and tighten the bolts. Tightening torque: 5 Nm
12. Install the right engine mount bracket bolts. Tightening torque: M12 80 Nm; M10 60 Nm
13. Install the right engine mount. Refer to Procedure: Right Engine Mount (303-01B Engine - 2.2L Duratorq - Td4, Removal and installation).
14. Install thermostat. Refer to Procedure: Thermostat (303-03B Engine cooling - 2.2L Duratorq - Td4, Removal and installation).
15. Apply clean engine oil to the surface of the camshaft and bearings as follows: on the top surface of the cylinder head; on the upper side of the working surface of each bearing, on each bearing cap; ONLY on the crankshaft journals, not on the base circle. Refer to Procedure: Camshafts (303-01B Engine - 2.2L Duratorq - Td4, Removal and installation).
16. Install the exhaust manifold. Refer to Procedure: Exhaust Manifold (303-01B Engine - 2.2L Duratorq - Td4, Removal and installation).
17. Connect a wire of weight to the accumulator and establish a cover. Refer to procedure: Specifications (414-00 Charging system - General information, Specifications).
Comments on this article