WARNING: If any items above the hydraulic control box are being replaced (HCU), including the HCU itself, bleed the brake system using the diagnostic system prescribed by Land Rover. This will ensure complete removal of air from the new element (ov).
NOTE: The procedure below is for bleeding the brake system when replacing downstream parts of the HCU. If the performed operations have affected only one of the circuits of the brake system - primary or secondary - only air is removed from this circuit. Partial bleeding of the brake system is permitted only if there is minimal loss of brake fluid when the brake pipe or hose is disconnected.
1. Raise and support the vehicle. Make sure the brake fluid lines are secure and there are no signs of brake fluid leakage. If there are signs of brake fluid leakage, find the cause of the leak and eliminate it, and only then proceed to bleed air from the brake system. Refer to Procedure: Brake System (206-00 Brake system - General information, Diagnostics and checks). Press and release the brake pedal until the vacuum booster disengages.
WARNING: It is forbidden to carry out work on a vehicle supported only by a jack. Always place secure supports under the vehicle.

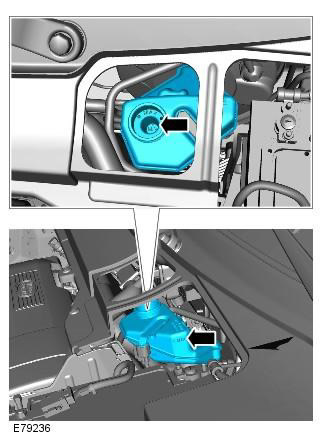
2. Remove the cap from the hydraulic brake reservoir. Add brake fluid to the reservoir up to the maximum mark. Place a tube over the brake caliper bleed screw and immerse the end of the bleed tube in a suitable container containing a small amount of the prescribed brake fluid.
WARNING: Do not allow dirt or foreign liquids to enter the reservoir. Use only fresh brake fluid to specification from a sealed container. It is forbidden to mix different brands of brake fluid due to their possible incompatibility.
CAUTION: Brake fluid, if it comes into contact with the paintwork, may damage it. If you spill brake fluid, remove it immediately and flush the area with water.

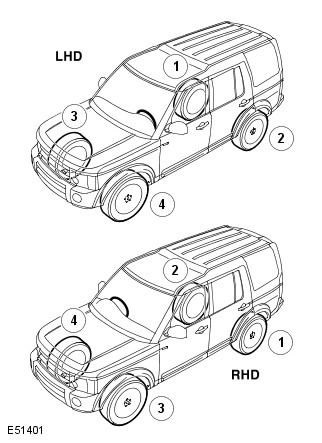
3. Start with the brake caliper farthest from the master cylinder: loosen the bleed screw half a turn - three quarters of a turn.

4. With help from others, gently depress the brake pedal to failure and allow it to return to its original position. Repeat this procedure until clear, air-free fluid flows into the bleeder container. When clean brake fluid without bubbles begins to flow into the container, depress the pedal and do not release it.
CAUTION: The brake fluid reservoir must remain filled with new, clean brake fluid throughout the bleeding procedure.
5. With the brake pedal fully depressed, tighten the air bleed screw. Tightening torque: 10 Nm
CAUTION: After venting, be sure to put a cap on the bleed screw. This will protect the air bleed screw from corrosion.
6. Add brake fluid to the reservoir up to the maximum mark.

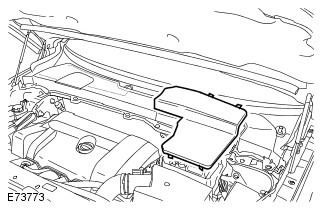
7. Repeat the above procedure to bleed air from each brake caliper. Add brake fluid to the reservoir up to the maximum mark. Check the operation of the brake system and make sure there are no leaks. Reinstall the brake fluid reservoir cap. Install the tank access panel.
WARNING: Incorrect bleed sequence can seriously affect braking performance.
Comments on this article