Protect surrounding paintwork to avoid damage. Protect the surrounding finish to avoid damage.
Removing
1.
- Remove the rear section of the roof molding.
- Remove two clamps.
- Working from the rear end, carefully release the molding.
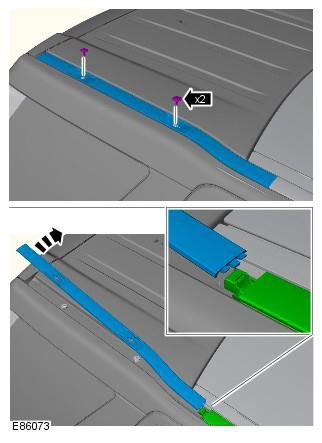
2.
- Remove the front section of the roof molding.
- Working from the rear end, carefully release the molding.
- Release two clamps.
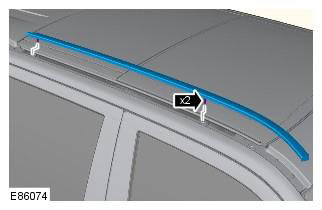
3. Repeat steps 1 and 2 on the other side.
4. Partially open the sunroof glass panel to gain access.
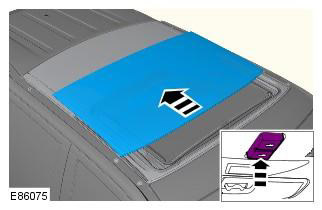
5. Remove a covering of a ceiling. Refer to Procedure: Upper Trim - Vehicle Included: Tilt Sunroof (501-05 Interior trim, Removal and installation).
6. Disconnect the drain tubes.
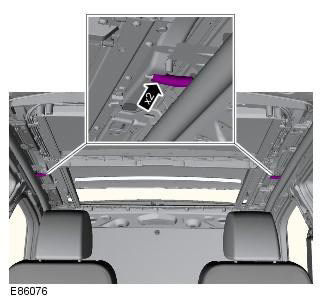
7. Release the sunroof panel tethers.
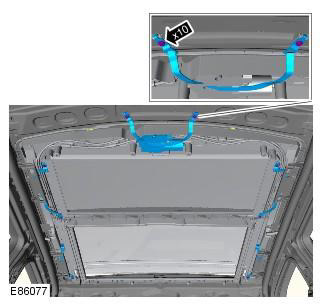
8.
- Pull the glazing wire through the sunroof panel sealant into the vehicle.
- Working in a counter-clockwise direction, cut through the sealant to the front dowel pin.
WARNING: Use protective gloves and goggles.
Protect surrounding paintwork to avoid damage. Protect the surrounding finish to avoid damage.
If the original sunroof panel is installed, be careful not to damage the dowel pins.
NOTE: This step requires the assistance of a second mechanic.
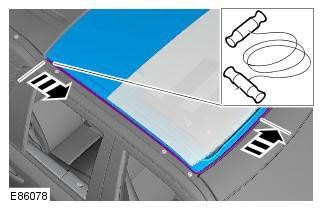
9. Working in a clockwise direction, cut through the sealant to the front dowel pin.
CAUTION: If an original sunroof panel is being installed, be careful not to damage the mounting pins.
NOTE: This step requires the assistance of a second mechanic.
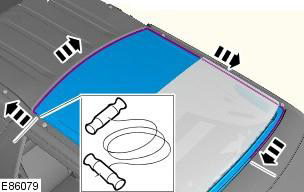
10. Close the sunroof glass panel.
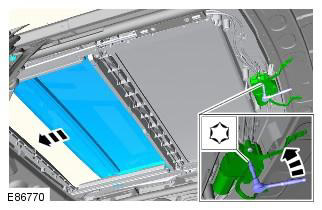
11. With assistance, remove the sunroof panel assembly.
CAUTION: Do not lift the sunroof panel by the curtains.
NOTE: This step requires the assistance of a second mechanic.
12. Carefully remove the sealant from the body to form a smooth surface.
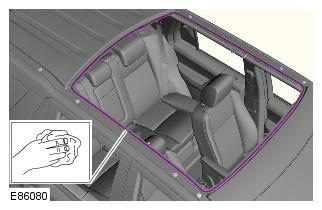
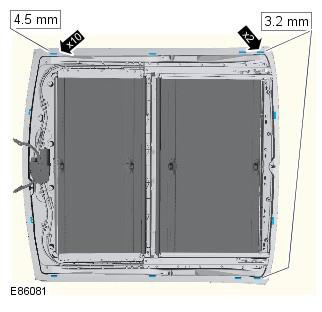
13.
- Remove 12 rubber spacers.
- Carefully remove the sealant from the sunroof panel to create a smooth surface.
NOTE: Mark the position of the rubber spacers.
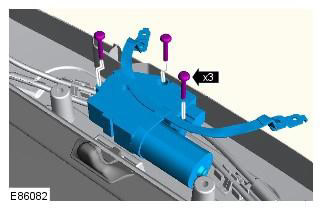
14. Remove the sunroof panel motor.
NOTE: Do not proceed with disassembly if the element is being removed only to gain access.
Installation
1. Install the sunroof panel motor. Tightening torque: 2.5 Nm
2. Apply a primer of the correct specification to the surface of the sealant on the body and allow it to cure.
CAUTION: Clean surface of foreign material.
3.
- Apply a primer of the correct specification to the surface of the sealant on the sunroof panel and allow it to cure.
- Install new rubber spacers to the sunroof panel.
- Install the prepared cut tip on the caulk cartridge, remove the cap, shake out the solids and install the cartridge on the caulk gun.
CAUTION: Clean surface of foreign material.
4. Apply a continuous bead of sealant to the body.
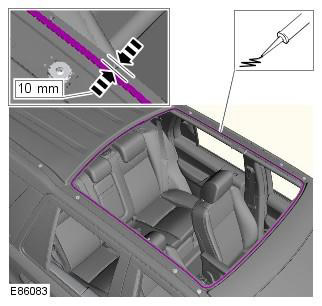
5. Apply additional sealant to body flanges.
6. With assistance, install the sunroof panel assembly.
7. Lightly press the sunroof panel assembly against the sealant.
8. Attach drain tubes.
9. Check the tightness of the connection, apply additional sealant if necessary. If water is used for testing, do not test until the sealant has cured. Spray water around the sunroof panel assembly and check for leaks. Mark the location of the leaks. Dry the sunroof panel and sealant, then apply additional sealant.
10. Attach sunroof panel tethers. Tightening torque: 4 Nm
11. Install the headlining. Refer to Procedure: Upper Trim - Vehicle Included: Tilt Sunroof (501-05 Interior trim, Removal and installation).
12. Install roof moldings.
Clean the surface of foreign material. Observe absolute cleanliness when handling this element.
13. Clear solvent contact surfaces of a body.
14. Remove the protective tape.
15. Align the clips.
16. Align and secure moldings.
Comments on this article