Removing
1.
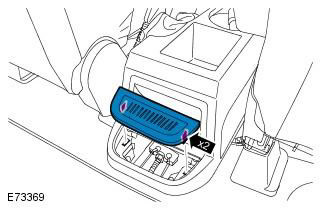
2. Remove the storage compartment.
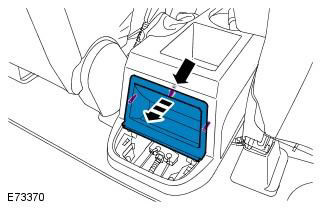
3. Turn out an adjusting nut and disconnect a forward cable of a parking brake.
NOTE: Use an additional wrench to prevent the element from rotating.
4. Release the rear parking brake cables and remove the compensator.
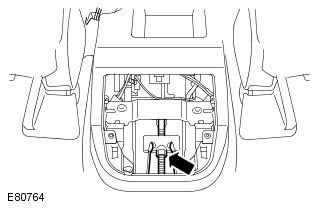
5. Remove panels of furnish of a back lateral part of a body. Refer to Procedure: Rear Side Trim Panel (501-05 Interior trim, Removal and installation).
6.
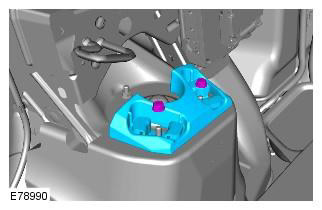
7. Repeat the above procedure on the other side.
8.
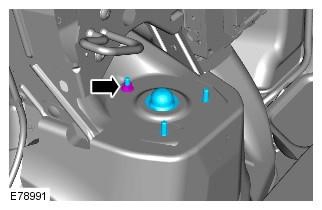
9. Repeat the above procedure on the other side.
10. Raise and support the car
WARNING: Place secure stands under the vehicle.
11. Remove both rear wheels complete with tires. Refer to procedure: Wheel and tire (204-04 Wheels and tires, Removal and installation).
12. Remove rear suspension height sensor (in the presence of). Refer to Procedure: Rear Suspension Height Sensor (204-05 Dynamic vehicle suspension, Removal and installation).
13. Remove the rear muffler. Refer to Procedure: Exhaust System (309-00B Exhaust system - 2.2L Duratorq - Td4, Removal and installation).
14. Discard bolts.
Mark the position of the driveshaft flange relative to the drive gear flange. To avoid damage to the hinge or boot, do not allow the propeller shaft to hang unsecured on one side.
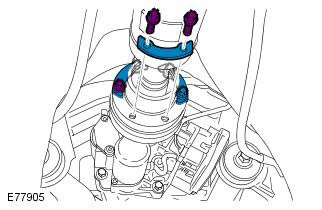
15.
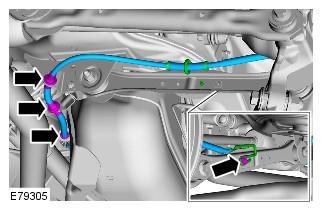
16. Repeat the above procedure on the other side.
17.
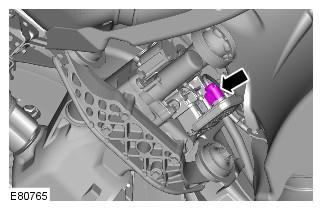
18.
19. Repeat the above procedure on the other side.
20. Attach the rear brake caliper to the side.
CAUTION: Do not stress the brake hose.
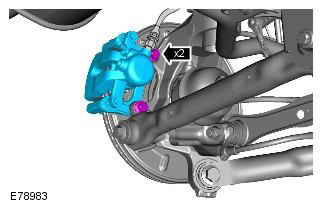
21. Repeat the above procedure on the other side.
22. Disconnect an arm of fastening of the trailing arm to a body.
CAUTION: Make sure the bushing (And) or insulator (s) not deformed or left without support during this procedure.
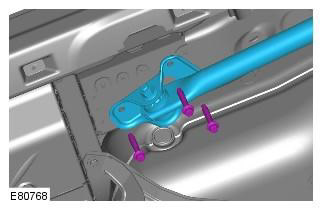
23. Repeat the above procedure on the other side.
24. Support the subframe. General Equipment: Powertrain Jack
25.
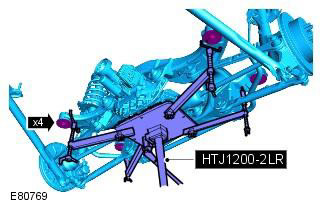
26. Gently lower the subframe to gain access to the differential ventilation lines.
27.
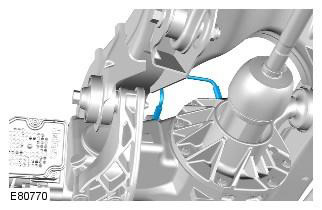
28. With assistance, remove the rear subframe assembly.
CAUTION: Make sure that no items are pinched/pinched.
29.
NOTE: Do not proceed with further dismantling if the element is removed only for access.
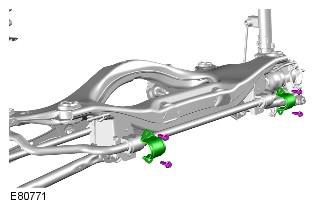
30.
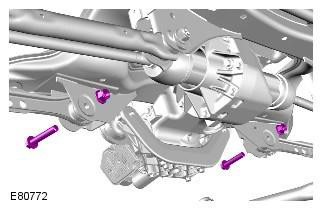
31.
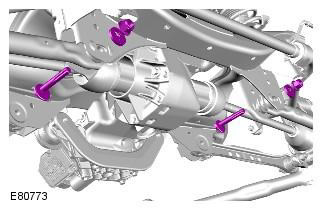
32. Discard bolts.
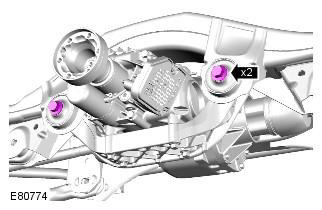
33. Discard bolts.
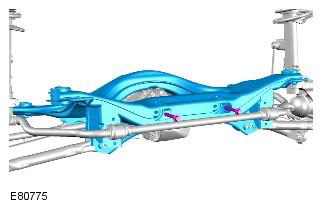
34. With assistance, remove the rear subframe.
Installation
1.
- Clean the contact surfaces of the elements.
- With assistance, install the subframe.
- With assistance, align the position and secure the differential.
- Tighten the rear bolts. Tightening torque: 110 Nm
- Tighten the front bolts. Tightening torque: 175 Nm
CAUTION: Use new bolts.
2. Align the position of the suspension arms in relation to the subframe and screw in the bolts, but do not fully tighten at this stage.
CAUTION: Use new bolts.
3. Use the special tool to support the subframe.
4. Connect the transmission vent lines.
5. With assistance, install the subframe on the body and tighten the bolts. Tightening torque: 175 Nm
Make sure that no elements are pinched/squeezed. Use new bolts.
6. Install the stabilizer clamp bolts, but do not fully tighten them yet.
CAUTION: Use new bolts.
7. Connect the electrical connector of the active clutch module.
8. Remove the gearbox jack. General Equipment: Powertrain Jack
9. Establish brackets of fastening of the trailing arm to a body. Tightening torque: 110 Nm
CAUTION: Use new bolts.
10.
- Clean the contact surfaces of the elements.
- Install the brake caliper support bracket. Tightening torque: 110 Nm
- Repeat the above procedure on the other side of the vehicle.
- Attach the wire and wheel speed sensor. Tightening torque: 5 Nm
- Fasten the wire in the clamps.
- Repeat the above procedure on the other side of the vehicle.
CAUTION: Make sure the brake hose is not kinked and installed in the correct position.
11. Left side: Mate the height sensor electrical connector.
12.
- Install and secure the rear shock absorbers.
- Install both mass dampers. Tightening torque: 25 Nm
13. Repeat the above procedure on the other side of the vehicle.
14.
- Clean the contact surfaces of the elements.
- Connect the propeller shaft to the rear flange. Tightening torque: 40 Nm
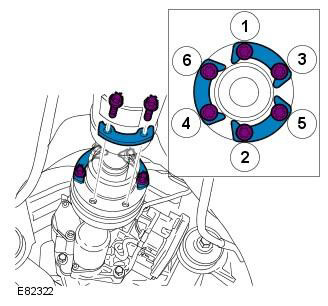
15. Install the parking brake cables on the guide tubes.
16. Connect the parking brake cables.
17. Adjust the parking brake. Refer to Procedure: Parking Brake Cable Adjustment (206-05 Parking Brake and Parking Brake Actuator, General Procedures).
18. Install the rear muffler. Refer to Procedure: Exhaust System (309-00B Exhaust system - 2.2L Duratorq - Td4, Removal and installation).
19. Establish panels of furnish of a back lateral part of salon. Refer to Procedure: Rear Side Trim Panel (501-05 Interior trim, Removal and installation).
20. Install the rear suspension height sensor. Refer to Procedure: Rear Suspension Height Sensor (204-05 Dynamic vehicle suspension, Removal and installation).
21. Install wheel and tire assembly. Refer to procedure: Wheel and tire (204-04 Wheels and tires, Removal and installation).
22. Tighten the stabilizer clamp bolts. Tightening torque: 60 Nm
CAUTION: Nuts and bolts must be tightened with the vehicle supported on the suspension.
23. Pull the suspension arms to the subframe. Tightening torque: 175 Nm
CAUTION: Nuts and bolts must be tightened with the vehicle supported on the suspension.
During installation, do not tighten the nuts and bolts until all 4 wheel alignment procedures have been completed.
24. Perform a complete vehicle geometry check and adjust accordingly.
Comments on this article