Removing
1. Secure the SRS system. Refer to procedure: Supplemental Restraint System (SRS) Depowering and Repowering (501-20, General procedures).
2. Remove the windshield wiper motor. Refer to Procedure: Windshield Wiper Motor (501-16 Windshield wipers and washers, Removal and installation).
3. Evacuate the air conditioning system. Refer to the procedure: Recycling the refrigerant, evacuating and charging the air conditioning system (A/C) (412-00 Climate control system - General information, General procedures).
4. Remove both front door assemblies. Refer to Procedure: Front Door (501-03 Lockable body elements, Removal and installation).
5. Remove both upper pillar trim panels "A". Refer to Procedure: Rack Trim Panel (501-05 Interior trim, Removal and installation).
6. Remove center pillar trim panels "A".
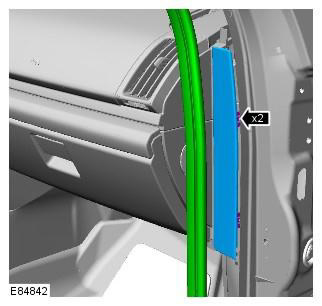
7. Release the front edge of both sill trim panels.
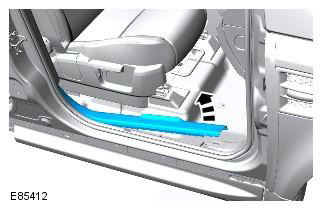
8. Remove both doorway trim panels. Refer to Procedure: Front Doorway Trim Panel (501-05 Interior trim, Removal and installation).
9. Remove the left front seat. Refer to Procedure: Front Seat (501-10 Seat, Removal and installation).
10. Remove the gear selector lever. Refer to Procedure: Selector Assembly (307-05 External controls for automatic transmission / transaxle, Removal and installation).
11.
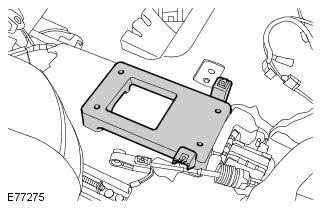
12. Remove both protruding sections of the floor console.
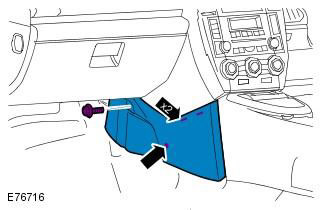
13.
CAUTION: Cover fiber optic connections to prevent dust from entering; Avoid bending fiber optic cables within a radius of more than 30mm.

14. Release a wire of weight.
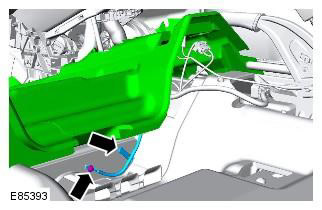
15. Disconnect the instrument panel wiring harness from the transmission tunnel.
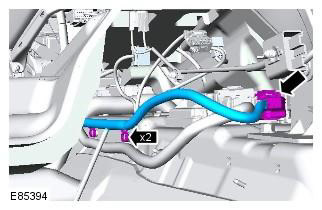
16. Remove the accessory junction box access cover.
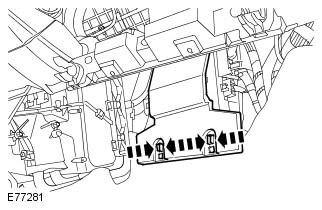
17. Disconnect the instrument panel wiring harness.
NOTE: The illustration shows a left-hand drive vehicle, a right-hand drive vehicle has a similar arrangement.
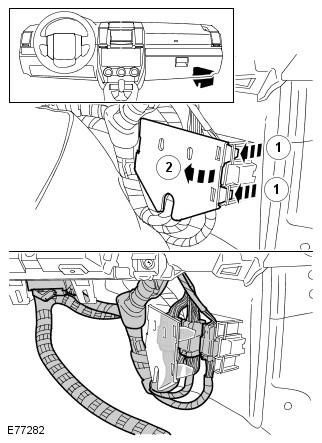
18.
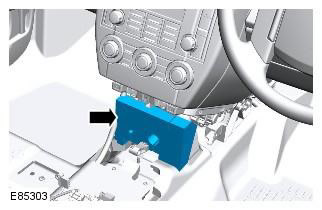
19. Remove both central lower air ducts from the heater body.
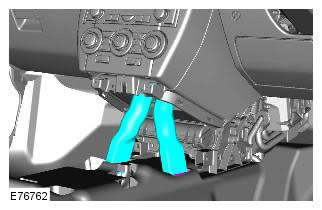
20. Disconnect a radiator of an additional electric heater.
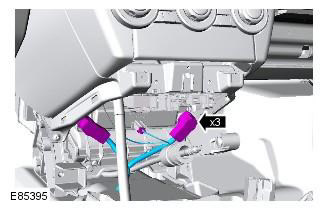
21. Disconnect the drain pipe from the heater housing.
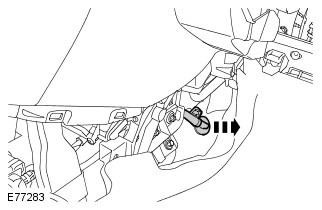
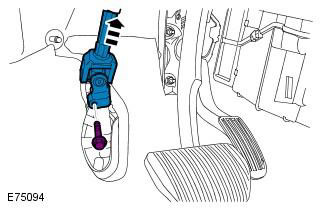
22. Disconnect the lower steering column shaft from the steering column.
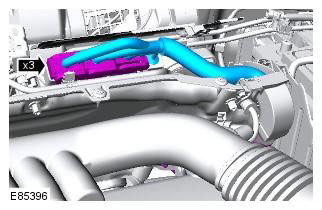
23. Disconnect the ECM electrical connectors.
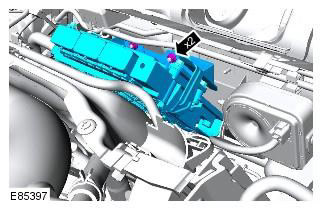
24. Remove the ECM bracket assembly.
25. Disconnect the A/C lines from the TXV.
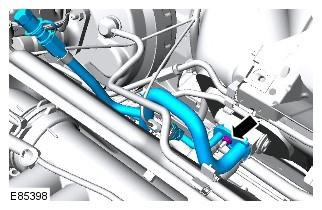
26.
- Clamp the hoses to minimize coolant loss.
- Turn the outer ring counterclockwise and disconnect the hose.
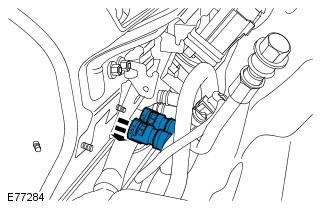
27.
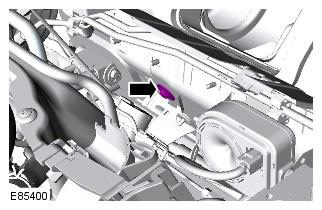
28. Remove the outer trim of the windshield heater.
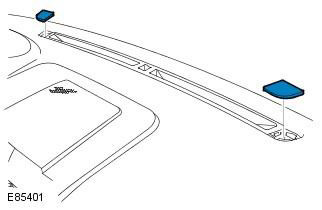
29.
- Remove the strut bolt covers "A".
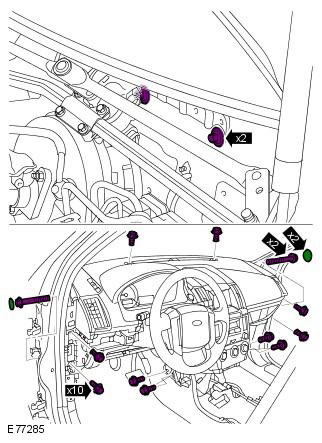
- Protect the surrounding bodywork and remove the 2 side mounting bolts.
- Remove 10 bolts.
- Remove 2 screws.
- Install protective covers on the interior trim.
- With assistance, remove the instrument panel.
Installation
1. Screw in and tighten the M8 bolts. Tightening torque: 24 Nm
2. Screw in and tighten the M12 bolts. Tightening torque: 40 Nm
3. Screw in 2 screws.
4. Remove protective tape and shrouds.
5. Install the bolt covers.
6. Install the windshield defroster trim.
7. Screw in a bolt of the case of a heater.
8. Install the heater core inlet and outlet hoses.
9. Remove collars from hoses of a cooling liquid.
10. Connect the A/C lines to the TXV and tighten the M6 nut. Tightening torque: 10 Nm
11. Install the ECM bracket assembly and tighten the nuts. Tightening torque: 10 Nm
12. Connect the electrical connectors of the ECM.
13. Attach the bottom shaft of a steering column and tighten a bolt. Tightening torque: 25 Nm
14. Connect the drain tube to the heater body.
15. Connect a radiator of an additional electric heater.
16. Install the central lower air ducts on the heater body.
17. Install NVH packing.
18. Establish a plait of electroconducting of the panel of devices.
19. Install the accessory junction box access cover.
20. Attach the instrument panel wiring harness to the transmission tunnel.
21. Fasten and tighten a wire of weight. Tightening torque: 10 Nm
22. Connect the body wiring harness to the instrument panel.
23. Install the raised sections of the floor console.
24. Install the selector lever support bracket.
25. Install the gear selector lever. Refer to Procedure: Selector Assembly (307-05 External controls for automatic transmission / transaxle, Removal and installation).
26. Install the left front seat. Refer to Procedure: Front Seat (501-10 Seat, Removal and installation).
27. Install both front door trim panels. Refer to Procedure: Front Doorway Trim Panel (501-05 Interior trim, Removal and installation).
28. Fix both panels of finishing of an overlay of a threshold.
29. Install center pillar trim panels "A".
30. Install the upper trim panels of both pillars "A". Refer to Procedure: Rack Trim Panel (501-05 Interior trim, Removal and installation).
31. Install both front door assemblies. Refer to Procedure: Front Door (501-03 Lockable body elements, Removal and installation).
32. Fill the air conditioning system (A/C). Refer to the procedure: Recycling the refrigerant, evacuating and charging the air conditioning system (A/C) (412-00 Climate control system - General information, General procedures).
33. Install the windshield wiper motor. Refer to Procedure: Windshield Wiper Motor (501-16 Windshield wipers and washers, Removal and installation).
34. Connect a wire of weight to the storage battery. Refer to procedure: Specifications (414-00 Charging system - General information, Specifications).
35. Check the coolant level and top up if necessary.
Comments on this article