Removing
1. Remove the audio control switches. Refer to Procedure: Additional Audio Controls for Rear Seat Passengers (415-01 Infotainment system, Removal and installation).
2. Remove the shift lever handle. Refer to Procedure: Gear Selector Knob (307-05 External controls for automatic transmission / transaxle, Removal and installation).
3. Vehicles without terrain response: Remove glove box tray.
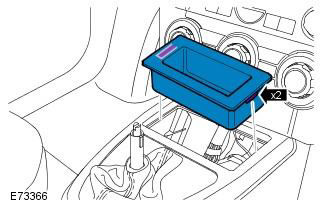
4. Vehicles with terrain response: Remove the stability control switch. Refer to procedure: Vehicle Handling and Suspension Optimization Switch (204-06 Optimization of vehicle suspension and handling characteristics, Removal and installation).
5. Release a cover of the lever of a gear change.
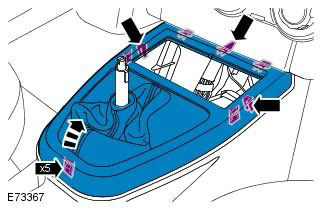
6. Remove a cover of the gear lever.
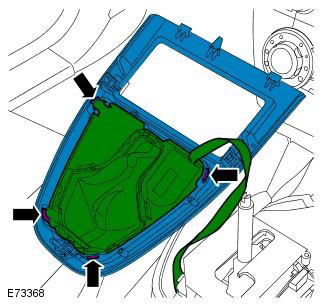
7.
- Set the parking brake to the highest possible position.
- Disconnect the electrical connector from the power outlet.
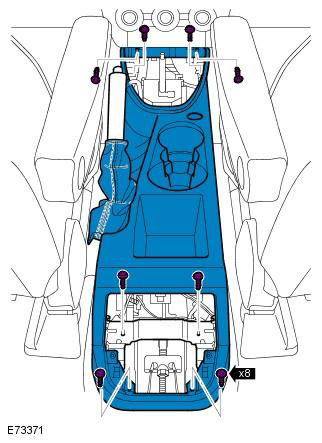
- Remove 8 screws.
- Remove the floor console.
CAUTION: Protect surrounding finish to avoid damage.
8.
NOTE: Do not proceed with further disassembly if the element is removed only for access.
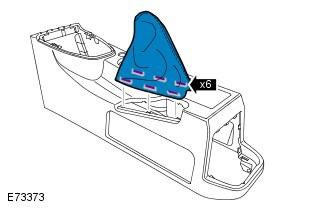
9.
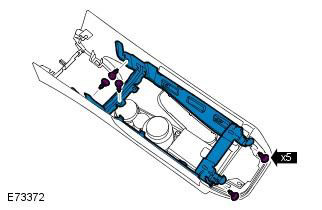
10.
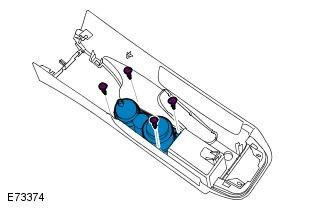
Installation
1. Install the drink holder.
2. Install the floor console bracket.
3. Install the parking brake lever boot.
4. Install the floor console.
5. Establish a cover of the lever of a gear change.
6. Fix a cover of the lever of a gear change.
7. Terrain response vehicles: Set the suspension and steering optimization system switch. Refer to procedure: Vehicle Handling and Suspension Optimization Switch (204-06 Optimization of vehicle suspension and handling characteristics, Removal and installation).
8. Vehicles without terrain response: Install glove box tray.
9. Install the shift knob. Refer to Procedure: Gear Selector Knob (307-05 External controls for automatic transmission / transaxle, Removal and installation).
10. Set the audio control switches. Refer to Procedure: Additional Audio Controls for Rear Seat Passengers (415-01 Infotainment system, Removal and installation).
Comments on this article