Dismantling
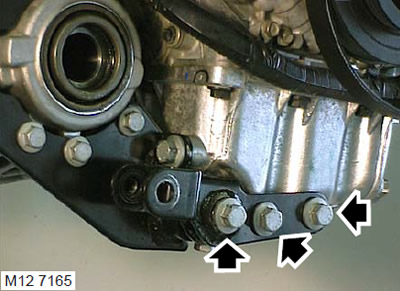
1. Remove the 3 bolts securing the lower cross member bracket to the pan and remove the bracket.
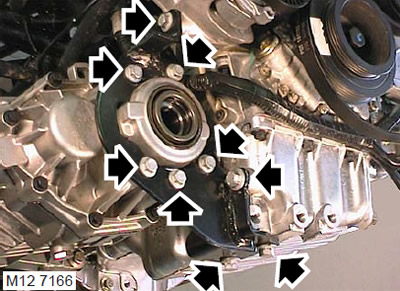
2. Turn away the top bolt of fastening of an arm of a distributing box to the block of cylinders.
3. Turn out 5 bolts of fastening of an arm to a distributing box.
4. Turn out 3 bolts of fastening of an arm of a distributing box to the pallet and remove an arm.
5. Release the transfer case breather hose from the clamp on the dipstick housing.
6. Loosen the clamp and disconnect the cooling system hoses from the transfer case.
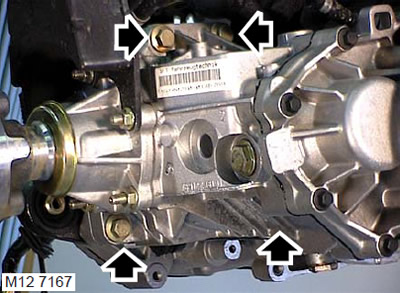
7. Turn away 4 bolts of fastening of a distributing box to a transmission and remove a distributing box.
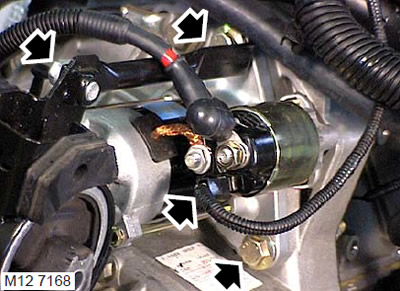
8. Disconnect the connector from the starter.
9. Turn away a bolt of fastening of a crossbeam to the left support of the engine.
10. Turn away 2 nuts with bolts of fastening of a starter to a transmission, remove a starter, remove a crossbar and a back cover.
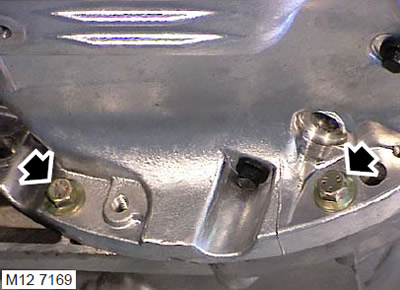
11. Turn away 2 bolts of fastening of the pallet of the engine to a transmission.
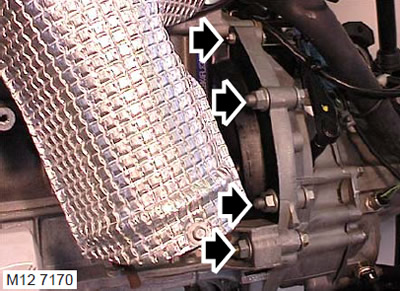
12. Mark how the flat washer is installed and unscrew the M6 nut with the bolt securing the front cover to the gearbox.
13. Turn away the top forward nut with a bolt of fastening of a transmission to the engine.
14. Turn away 2 forward nuts with bolts of fastening of a transmission to the engine, remove a forward cover.
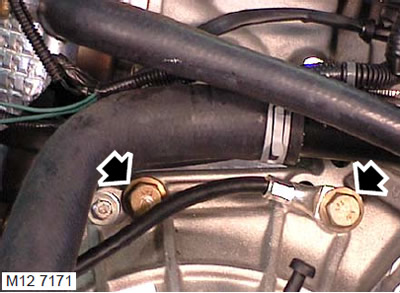
15. Notice the position of the tire "masses" engine and unscrew the 2 upper bolts securing the gearbox to the engine.
16. With the help of a partner, remove the gearbox from the engine.
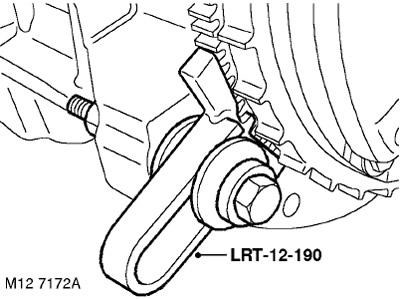
17. Install the LRT-12-190 flywheel stopper on the engine and secure it with the bolt.
18. Gradually loosen and remove the 6 bolts securing the clutch cover to the flywheel.
19. Remove the clutch cover and driven disc.
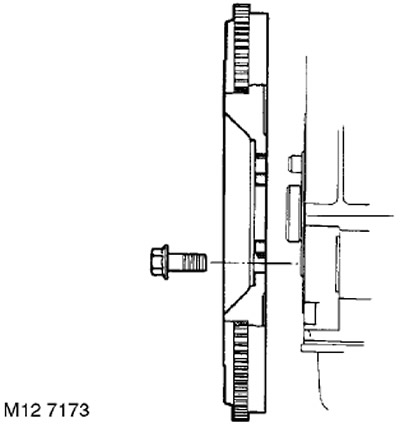
20. Remove and discard 6 flywheel to crankshaft bolts.
21. Remove flywheel stopper LRT-12-190.
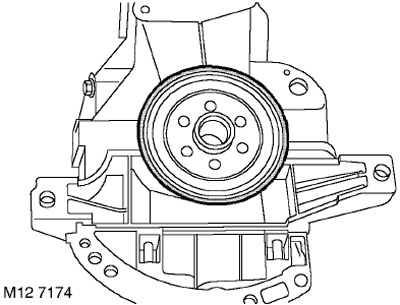
22. Using a screwdriver with a flat sting and not having sharp burrs, remove the rear oil seal from the cylinder block and discard the oil seal. Do not damage the sealing surface of the crankshaft journal.
Installation
1. Remove all traces of oil and sealant from the cylinder block, from the oil seal seat, and from the surface of the crankshaft journal.
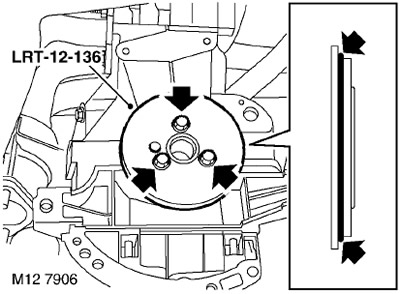
2. Apply a continuous bead of 1.5 mm thick STC 50550 sealant to the new oil seal as shown.
3. Install the oil seal on the cylinder block immediately.
CAUTION: The seals must be installed dry.
4. Install the LRT-12-136 mandrel on the crankshaft, secure the mandrel with three bolts.
5. Gradually tighten the LRT-12-136 gland crimp bolts until the gland is in place and leave the crimp in this position for 1 minute.
6. Remove mandrel LRT-12-136.
CAUTION: Wait 30 minutes for the sealant to cure before filling the engine with oil or turning the crankshaft.
7. Using the old drive plate mounting bolt, in which two cuts were made at an angle of 45°, clean the threaded sockets in the crankshaft flange from the remnants of the thread locker.
8. Wipe the flywheel and mating surface of the crankshaft.
9. Install the flywheel on the crankshaft.
10. Install flywheel stop LRT-12-190 to engine and secure with bolt.
11. Screw in new bolts of fastening of a flywheel to a cranked shaft and tighten them, crosswise, the moment of 80 Nanometers.
12. Place the driven plate on the pressure plate with the 'FLYWHEEL SIDE' lettering facing the flywheel.
13. Lay the driven plate on the pressure plate and insert the centering mandrel, LRT-12-151.
14. Screw in 6 bolts of fastening of a casing of coupling to a flywheel, tighten bolts so that the conducted disk kept in the central position. Remove the centering mandrel LRT-12-151 from the clutch housing.
15. Gradually, crosswise, tighten the bolts to a torque of 25 Nm.
16. Remove flywheel stopper LRT-12-190.
17. Wipe the mating surfaces of the engine and gearbox, pins and their sockets.
18. With the help of a partner, install the gearbox on the engine, paying attention to mating with the clutch and dowel pins.
19. Replace the tire "masses", screw in the two upper bolts securing the gearbox to the engine.
20. Install the front cover, screw in the bolts and tighten the nuts.
21. Tighten the top bolts and front nuts and bolts to 80 Nm. Tighten the bolts securing the gearbox to the pallet to 45 Nm.
22. Put a flat washer on the M6 bolt, screw in the bolt, fit the nut and tighten to 9 Nm.
23. With the help of a partner, install the transfer case on the gearbox, screw in the bolts and tighten them to a torque of 90 Nm.
24. Install the bracket on the transfer case and on the pallet, screw in the bolts of the bracket to the transfer case and tighten them to a torque of 50 Nm, and the bolts of the bracket to the pallet to a torque of 45 Nm.
25. Screw in the upper bolt of the transfer case bracket to the cylinder block and tighten it to 45 Nm.
26. Install the lower cross member bracket on the pallet, screw in the bolts and tighten them to 100 Nm.
27. Connect the cooling system hoses to the transfer case and secure them with a clamp.
28. Attach the transfer case breather hose to the clamp on the oil dipstick housing.
29. Clean the starter and gearbox mating surfaces.
30. Establish on the block of cylinders a back cover.
31. Install the starter and bottom bolt and nut, but do not tighten them at this stage.
32. Establish the lower cross-beam of the engine, screw in a bolt of fastening of a cross-beam to the left support of the engine, but do not tighten it.
33. Insert the top starter mounting bolt with nut.
34. Tighten the starter mounting bolts and nuts to 80 Nm.
35. Connect the connector to the starter retractor.
36. Add oil to the engine.
MAINTENANCE, MAINTENANCE, Engine oil and oil filter - K1.8.
Comments on this article