Dismantling
1. Disconnect "negative" battery terminal.
2. Remove the battery.
SYSTEM OF ENGINE START AND CHARGING OF AKB, REPAIR WORKS, Accumulator battery.
3. Remove the starter.
SYSTEM OF STARTING THE ENGINE AND CHARGING THE BATTERY, REPAIR WORKS, Starter - engine K1.8.
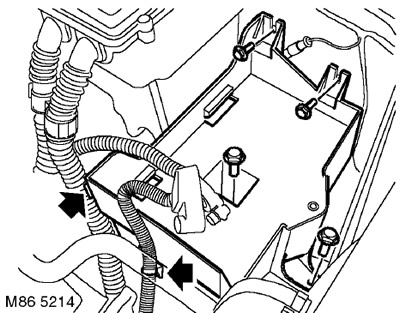
4. Disconnect 2 collars of fastening from the platform of the rechargeable battery. Remove the 4 bolts securing the battery platform and remove the battery platform.
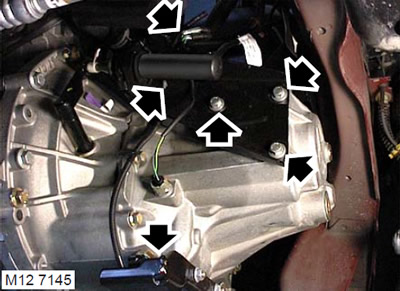
6. Disconnect the reversing light switch connector.
7. Disconnect the connector from the first gear engagement switch.
8. Disconnect the clamp securing the first gear contact sensor harness to the clutch slave cylinder bracket.
9. Turn away 3 bolts of fastening of an arm of the working cylinder to a transmission and fix an arm in the party.
10. Remove the transfer case (IRD).
TRANSFER BOX, REPAIRS, Transfer case: Models with K1.8 engine.
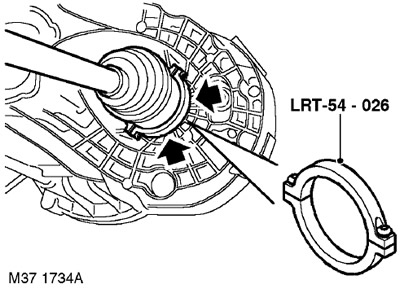
11. Install tool LRT-54-026 on the drive shaft inner joint. Using the lever, release the left inner joint from the gearbox.
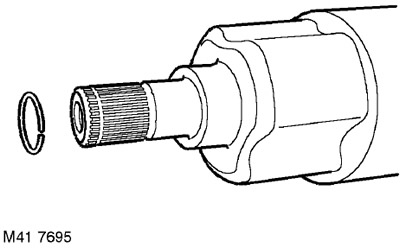
12. Remove and discard the left drive shaft inner pivot retaining ring.
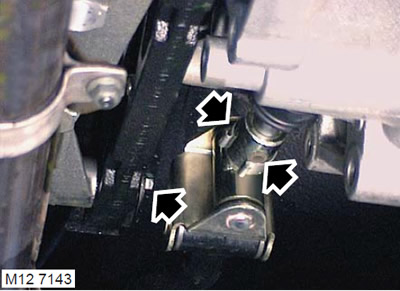
13. Remove shift rod pivot pin cover, remove and discard pin.
14. Disconnect the shift rod from the gear selector rod.
15. Turn away a bolt of fastening of a strut of a rod of a gear change to an arm of a distributing box, remove a strut from an arm.
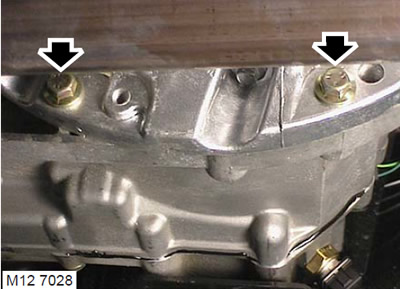
16. Turn away 2 bolts of fastening of the pallet of the engine to a transmission.
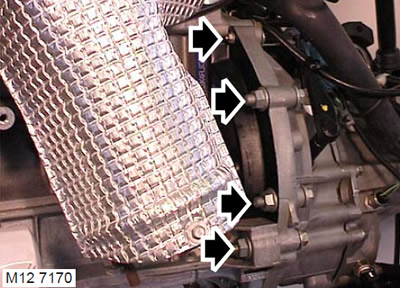
17. Mark how the flat washer is installed and unscrew the M6 nut with the bolt securing the front cover to the gearbox.
18. Turn away the top forward nut with a bolt of fastening of a transmission to the engine.
19. Turn away 2 forward nuts with bolts of fastening of a transmission to the engine, remove a forward cover.
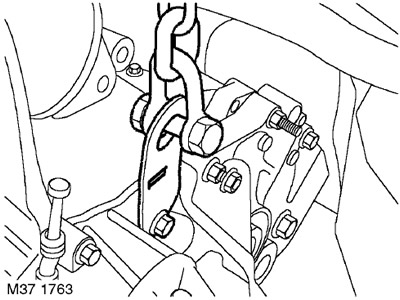
20. Turn out a bolt from a transmission, as it is shown in drawing and fix a lifting eye on a box with this bolt.
21. Attach lifting equipment to the lifting eye.
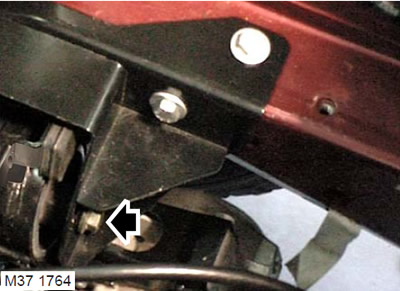
22. Turn out a through bolt of fastening of the left support of the engine to a transmission.
23. Lower the engine to gain the desired access.
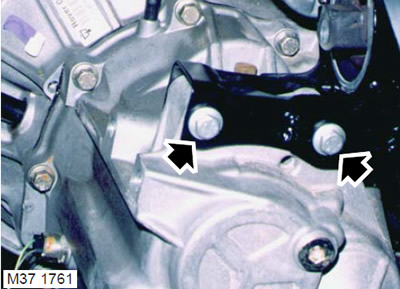
24. Turn out 2 bolts of fastening of the left support to a transmission and remove a support.
25. Support the engine by placing a jack with a block of wood as a spacer under the sump.
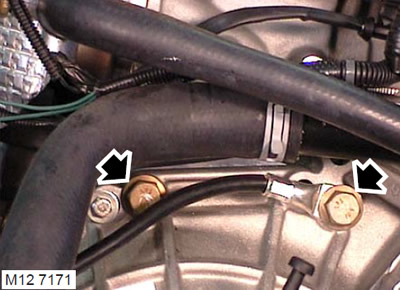
26. Notice the position of the tire "masses" engine and unscrew the 2 upper bolts securing the gearbox to the engine.
27. With the help of a partner, move the gearbox away from the 2 dowel pins. Lower the gearbox to the floor and remove the rigging from it.
Installation
1. Wipe the mating surfaces of the engine and gearbox, pins and their sockets.
2. Check the condition of the drive shaft seal and replace it if it is damaged or worn.
3. Lubricate input shaft splines lightly with molybdenum disulphide grease.
4. Wipe and degrease the threaded parts of the two upper gearbox-to-engine bolts. Apply STC 50552 to the threads of both bolts.
5. Install the gearbox under the vehicle and attach the rigging to it.
6. With the help of a partner, lift the gearbox and slide it onto the pins.
7. Replace the tire "masses", screw in the two upper bolts securing the gearbox to the engine.
8. Install the front cover, screw in the bolts and tighten the nuts.
9. Tighten the top bolts and front nuts and bolts to 80 Nm. Tighten the bolts securing the gearbox to the pallet to 45 Nm.
10. Put a flat washer on the M6 bolt, screw in the bolt, screw on the nut and tighten to 9 Nm.
11. Remove the rigging from the gearbox.
12. Turn away a bolt of fastening of an eye to a transmission, remove an eye, screw a bolt into place and tighten it with the moment of 45 Nanometers.
13. Install the left engine support on the gearbox, screw in the bolts and tighten them to 65 Nm.
14. Raise the transmission and align the left engine mount with the mount bracket. Install the through bolt and tighten to 80 Nm.
15. Remove the jack from under the engine.
16. Install the shift rod spacer, screw in the bolt and tighten it to 25 Nm.
17. Install the shift shaft onto the select shaft, install a NEW pivot pin and replace the cover.
18. Wipe the spline of the drive shaft and mating splines in the gearbox.
19. Install a new retaining ring on the end of the left drive shaft.
20. With the help of a partner, insert the left drive shaft into the gearbox, holding it at the right angle so as not to damage the gearbox oil seal.
21. Install the transfer case (IRD).
TRANSFER BOX, REPAIRS, Transfer case: Models with K1.8 engine.
22. Establish an arm of fastening of the working cylinder of coupling on a transmission, screw in bolts and tighten them the moment of 25 Nanometers.
23. Connect the connector to the first gear contact switch and secure the harness with a clamp on the slave cylinder bracket.
24. Connect the reversing light switch connector.
25. Reinstall the battery pad and tighten the mounting bolts to 10 Nm.
26. Fasten the wire harness with clamps to the battery platform bracket.
27. Reinstall the starter.
SYSTEM OF STARTING THE ENGINE AND CHARGING THE BATTERY, REPAIR WORKS, Starter - engine K1.8.
28. Install the battery.
ENGINE START AND CHARGING SYSTEM, REPAIR WORKS, Accumulator battery.
29. Attach "negative" battery terminal.
Comments on this article