Dismantling
1. Disconnect "negative" battery terminal.
2. Remove a transmission.
MANUAL GEARBOX - GETRAG, Rear cover, Gearbox.
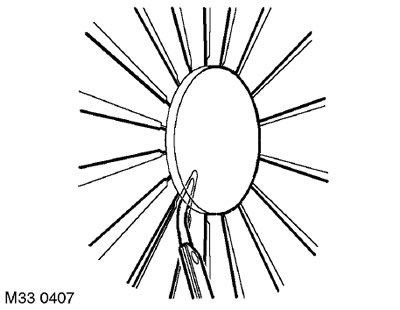
3. Place a flat disk on the petals of the diaphragm spring and check the gap between the disk petals with a feeler gauge. If the specified limit is exceeded on only one petal, then this is acceptable. Gap size: Operating limit is 1.0 mm.
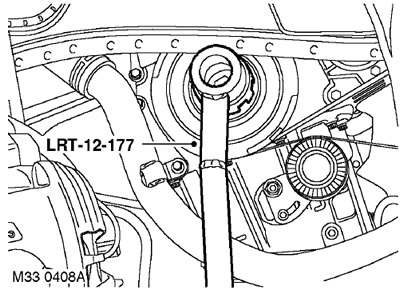
4. Fit tool LRT-12-177 to crankshaft.
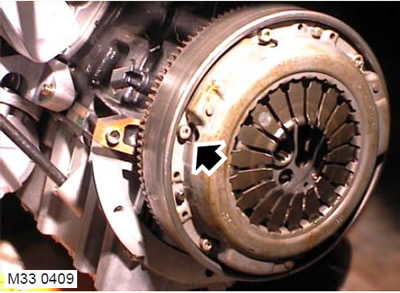
5. While holding the crankshaft, loosen and remove the 6 clutch cover mounting bolts.
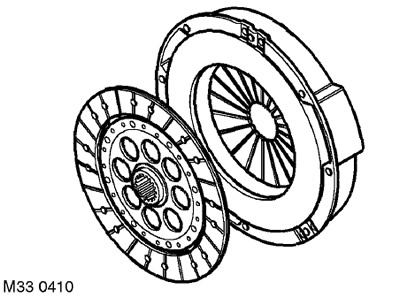
6. Remove the clutch cover and driven disc.
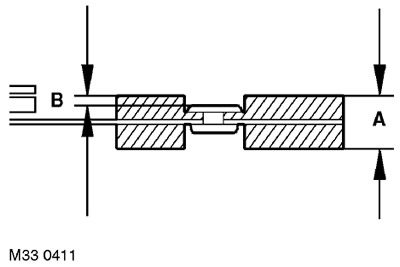
7. Measure thickness of a conducted disk, replace a conducted disk if its thickness is less than admissible. Driven plate thickness (crimped) A: New disc = 7.5 mm. Minimum allowable thickness = 5.9 mm.
8. Measure the sinking of rivets, replace the driven disk if the sinking is less than the allowable value. Rivet driving B: New disc = 1.2 mm. Minimum allowable sinking = 0.2 mm.
9. Check pressure plate for wear or damage. Check for tarnish on the contact surface (dark yellow to blue), replace the disc if necessary.
NOTE: Replace pressure plate if accidentally dropped.
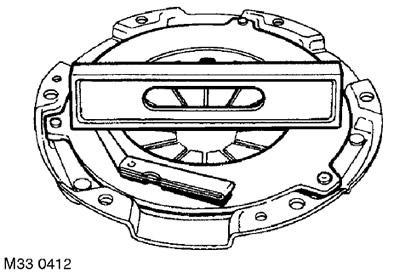
10. Using a straightedge and feeler gauge, check the disc surface geometry at four different points. Replace disc if warpage is greater than acceptable. Warping of the pressure plate: The operating limit is 0.15 mm.
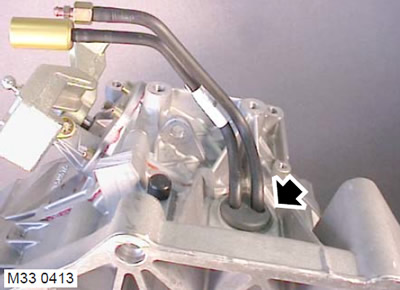
11. Release the bushings holding the clutch tubes.
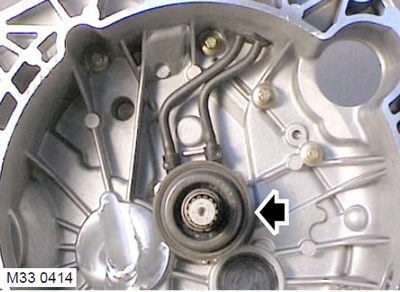
12. Remove release bearing.
13. Check the release bearing for wear or damage and replace if necessary.
Installation
1. Clean the release bearing guide bush.
2. Lubricate the release bearing guide bushing with molybdenum disulphide grease.
3. Install the release bearing and secure the clutch tube bushing.
4. Clean the pressure plate, flywheel, dowel pins and their holes.
5. Check the flywheel running surface for nicks or other damage. Replace the flywheel if the working surface is damaged or worn.
6. Lubricate the driven disc splines with molybdenum disulphide grease.
7. Place the driven plate on the pressure plate with the 'GEARBOX SIDE' lettering facing the gearbox.
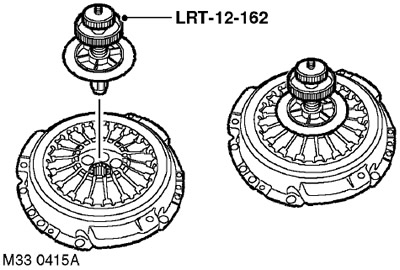
8. Center the driven disc using the LRT-12-162 mandrel.
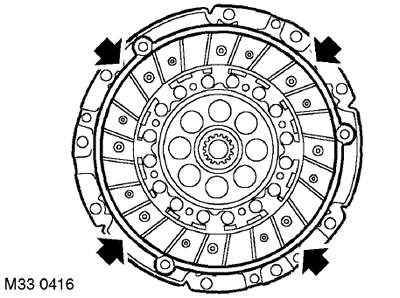
9. Check up quality of centering of a conducted disk in relation to pressure.
10. Install the clutch assembly on the flywheel and slide it over the dowel pins.
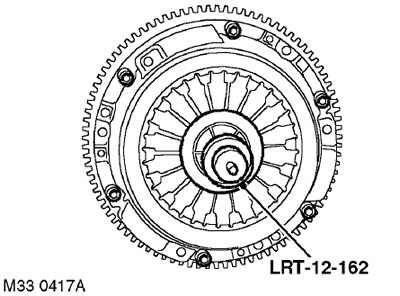
11. Screw in bolts of fastening of a casing of coupling and tighten them, crosswise, the moment of 25 Nm.
12. Remove centering mandrel LRT-12-162.
13. Install the gearbox.
MANUAL GEARBOX - GETRAG, Rear cover, Gearbox.
14. Attach "negative" battery terminal.
Comments on this article