- Wash the bearing thoroughly. All traces of grease must be removed. For washing, use special formulations. During assembly/disassembly operations, keep the work area absolutely clean.
- Carefully inspect the rolling elements, treadmills, the outer cylindrical surface of the outer ring and the inner cylindrical surface of the inner ring. The appearance of tint colors indicates the beginning of the destruction of the bearing. In this case, the bearing must be replaced.
- Pinch the inner race of the bearing between the index and thumb fingers of one hand. Rotate the outer race with your other hand. Rotation should be completely free. Now clamp the outer race and rotate the inner one.
- Gently rotate the outer ring alternately in forward and reverse directions, keeping the inner ring from turning. Pay attention to the freedom with which the rotation of the ring occurs. The bearing must be replaced if the rotation of the ring is not smooth enough.
- Lubricate the bearing generously with grease before mounting.
- Inspect the shaft journal and seat in the housing. Discoloration or other marks indicate a loose bearing fit.
- Before mounting the bearing, clean the shaft neck and the housing groove for the bearing from dirt and burrs.
- If one of the bearings in a pair is to be replaced, it is recommended that both bearings be replaced. An exception is the case when the replacement of one of the bearings is performed on a small resource and the other bearing of the pair does not have any signs of damage.
- Never install a ball or roller bearing without first verifying that it is in good condition.
- If for some reason you removed the wheel bearings, then always install new bearings when assembling the assembly. Do not install used wheel bearings.
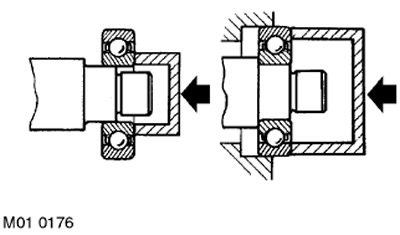
- When mounting the bearing on the shaft, apply force to the inner ring. When mounting the bearing into the housing groove, apply force to the outer ring.
- If the bearings are lubricated with grease (e.g. wheel bearings), fill the space between the bearing and the seal with the recommended grade of grease before mounting the seal.
- Disassembled bearing parts (e.g. tapered bearings) always mark with paint so as not to confuse during assembly. Do not replace bearing parts individually (e.g. do not attempt to replace rollers without changing the outer race). The entire bearing must be replaced.

Comments on this article