Dismantling
1. Tilt the front seatbacks forward.
2. Remove both sun visors.
INTERIOR PARTS, REPAIRS, Sun visor.
3. Remove the upper trim panels from both A-pillars 'A'.
INTERIOR TRIM PARTS, REPAIRS, A-pillar 'A' upper trim panel replacement.

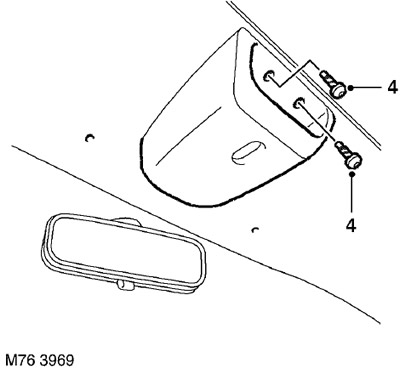
4. Remove the 2 screws securing the ceiling panel to the front edge of the roof panel.

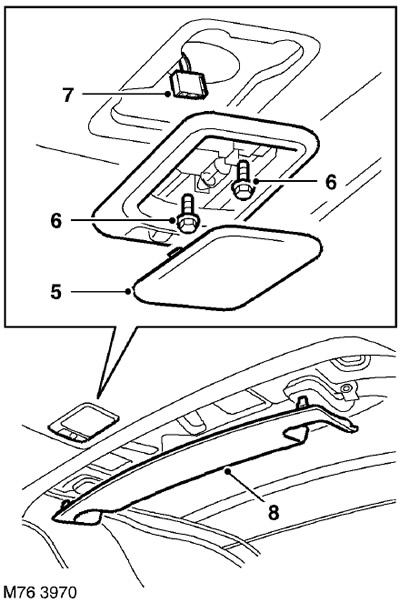
5. Remove the diffuser from the dome light.
6. Turn away 2 screws of fastening of a plafond to a body.
7. Disconnect an electric socket from a plafond and remove a plafond.
8. Release the clips that secure the roof panel rear trim to the body and remove the trim.

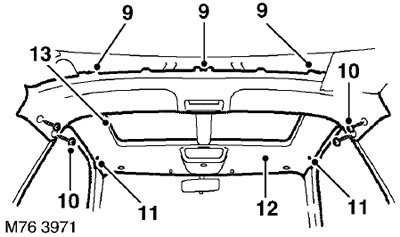
9. Remove the 3 clips that secure the back of the ceiling panel to the roof panel.
10. Remove the 4 screws securing the ceiling panel to the 'B' pillars.
11. Release the 2 clips that secure the side parts of the ceiling panel to the body.
12. Tilt down the front of the ceiling panel.
13. Release the ceiling panel from the roof hatch seal and remove the ceiling panel.

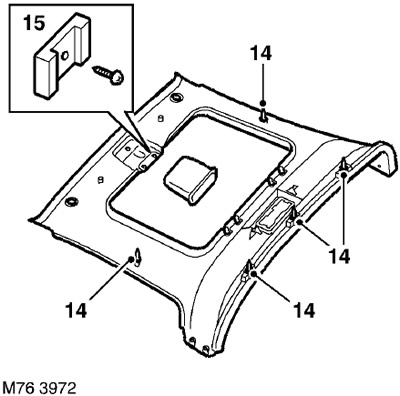
14. Remove the fasteners from the ceiling panel.
15. Remove the 3 screws and remove the ceiling panel pocket.
Installation
1. Place the pocket on the ceiling panel and fix it with screws.
2. Install the fixings on the ceiling panel.
3. Install the ceiling panel and secure it with the clips to the roof panel.
4. Attach the ceiling panel to the 'B' posts with the screws.
5. Attach the ceiling panel behind the rear deflector seals.
6. Install the ceiling panel rear trim and secure with the clips.
7. Align the ceiling panel with the sunroof seal.
8. Attach the ceiling lamp to the ceiling panel and connect the electrical connector to it.
9. Install the ceiling light and secure it with screws.
10. Install the ceiling light diffuser.
11. Install both sun visors.
INTERIOR PARTS, REPAIRS, Sun visor.
12. Install the A-pillar upper trim panels 'A'.
INTERIOR TRIM PARTS, REPAIRS, A-pillar 'A' upper trim panel replacement.
13. Return the front seatbacks to their original position.
Comments on this article