Special tool
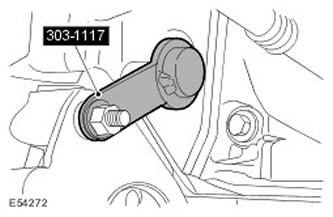
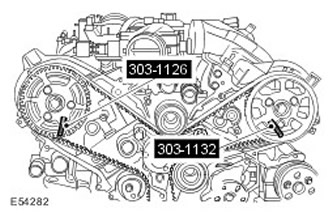
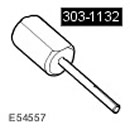 Retaining rod - crankshaft pulleys 303-1132 Retaining rod - crankshaft pulleys 303-1132 | 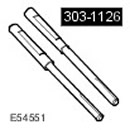 Injection timing rod - crankshaft pulleys 303-1126 Injection timing rod - crankshaft pulleys 303-1126 | 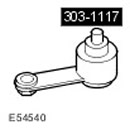 Injection timing rod - automatic transmission 303-1117 Injection timing rod - automatic transmission 303-1117 |
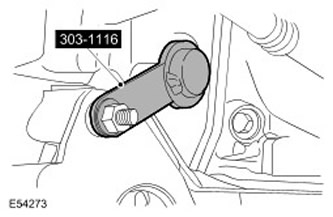
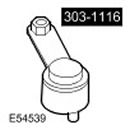 Injection timing rod - manual transmission 303-1116 Injection timing rod - manual transmission 303-1116 |
Removing
All cars
1. Disconnect the wire "masses" from the battery. For more information refer to Specification.
2. Remove the timing belt cover. For more information, refer to Timing Belt Cover (12.65.03)
3.
WARNING: It is forbidden to carry out work on a vehicle standing on only one jack. Always support the vehicle with jack stands.
Raise and support the vehicle.
4. Remove the starter. For more information refer to Starter (86.60.01)
5. Remove the crankshaft timing wheel seal from the cylinder block.
6. Rotate the crankshaft clockwise to align the mounting hole in the flywheel or flex plate with the hole in the block.
7. Check the alignment of the crankshaft pulley mounting holes. If the mounting holes do not line up, turn the crankshaft clockwise one more turn.
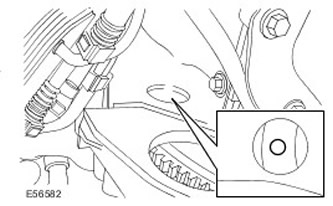
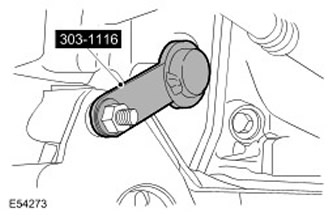
Vehicles with automatic transmission
8. Use the special tool to block the elastic plate. Secure the special tool with the starter bolt.
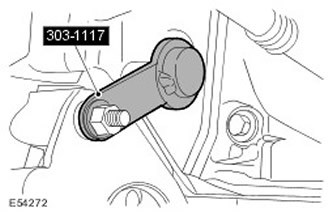
Vehicles with manual transmission
9. Lock the flywheel using the special tool. Secure the special tool with the starter bolt.
10. Install the special tools on the camshaft pulleys.
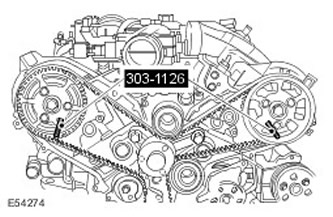
11.
WARNING: Do not use special tools to lock the camshafts. Failure to do so may result in damage to the engine or special tools.
Loosen the six bolts securing the damping clutch of the exhaust camshaft pulley. Hold the camshaft pulley center bolts with a suitable tool.
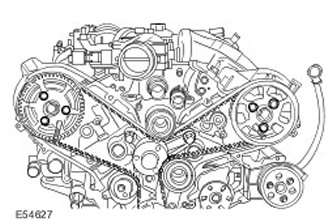
12. Remove and discard the timing belt tensioner. Loosen the bolt and discard it.
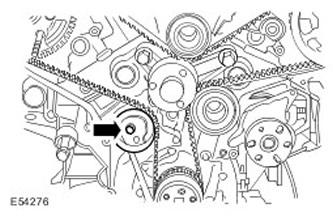
13. Remove and discard the timing belt.
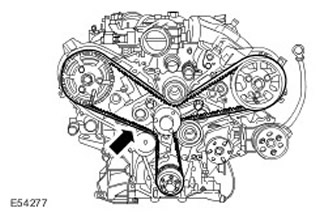
Installation
All cars
1. Turn the pulleys of both camshafts clockwise.
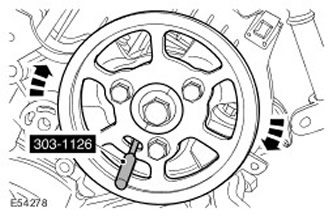
2. Install a new timing belt tensioner. Install the new bolt, but do not fully tighten it yet.
3.
CAUTION: Make sure both camshaft pulleys are turned clockwise.
Install a new timing belt.
- Starting at the crankshaft pulley, install the timing belt counterclockwise in the sequence shown.
- Step 1: Put the timing belt on the crankshaft pulley.
- Step 2: Put the timing belt on the intermediate pulley.
- Step 3: Put the timing belt on the left camshaft pulley.
- Step 4: Put the timing belt on the intermediate pulley.
- Step 5: Put the timing belt on the right camshaft pulley.
- Step 6: Put the timing belt on the timing belt tensioner.
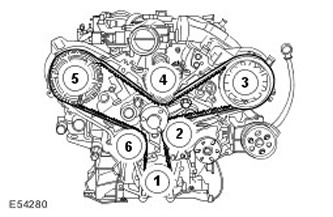
4.
CAUTION: Make sure the tensioner window lines up with the groove.
Tension the timing belt.
- Turn the tensioner assembly counterclockwise.
- Tighten (tightening torque 24 Nm).
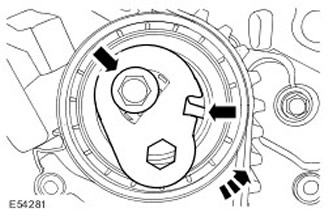
5.
WARNING: Do not use special tools to lock the camshafts. Failure to do so may result in damage to the engine or special tools.
Hold the camshaft pulley center bolts with a suitable tool.
- Tighten the six exhaust camshaft pulley damping clutch bolts.
- Tighten the bolts (tightening torque 23 Nm).
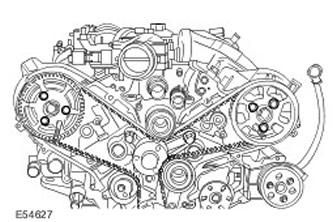
6. Remove the special tools from the camshaft pulleys.
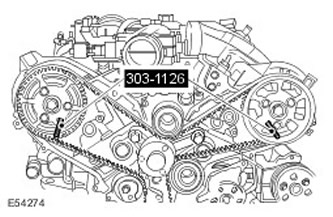
Vehicles with manual transmission
7. Remove the special tool from the flywheel. Vehicles with automatic transmission
8. Remove the special tool from the elastic plate.
All cars
9. Turn the engine crankshaft two turns clockwise. Vehicles with manual transmission
10. Lock the flywheel using the special tool. Secure the special tool with the starter bolt.
Vehicles with automatic transmission
11. Using the special tool, lock the elastic plate. Secure the special tool with the starter bolt.
12. Install the special tools on the exhaust camshaft pulleys.
- If the special tool is not properly seated, repeat the timing belt installation procedure.
- Remove the special tools from the camshaft pulleys.
Vehicles with manual transmission
13. Remove the special tool from the flywheel. Install the sealing sleeve.
Vehicles with automatic transmission
14. Remove the special tool from the elastic plate. Install the sealing sleeve.
All cars
15. Install the starter. For more information refer to Starter (86.60.01)
16. Install the timing belt cover. For more information, refer to Timing Belt Cover (12.65.03)
17. Connect the wire "masses" to the battery. For more information refer to Specification.
Comments on this article