Removing
1. Disconnect the battery ground wire. For more information refer to Specification.
2. Remove the top heat-shielding screen of a motor compartment. Remove the screw.
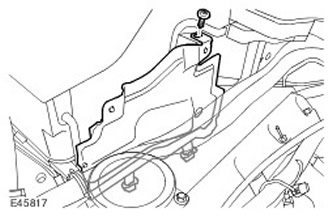
3. Rearrange the soundproofing of the nozzles.
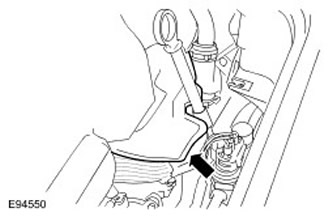
4. Remove the oil gauge tube and dipstick from the oil pan extension.
- Turn out a bolt.
- Remove the O-ring and discard it.
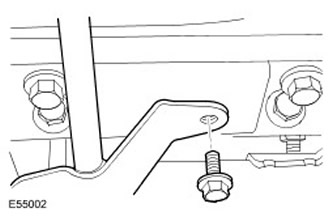
5.
WARNING: It is forbidden to carry out work on a vehicle standing on only one jack. Always place secure supports under the vehicle.
Raise the car and place it on stands.
6. Remove the front wheels complete with tires.
7. Remove the front axle tube. For more information refer to Axle tube (47.10.42)
8. Remove the oil pan. For more information refer to Oil Sump (12.60.44)
9. Remove the starter. For more information refer to Starter (86.60.01)
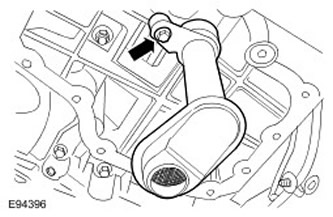
10. Remove the oil pickup tube with strainer assembly.
- Turn out a bolt.
- Remove the O-ring and discard it.
11. Turn out 3 bolts of a wire going from the accumulator to an electromagnet of a starter.
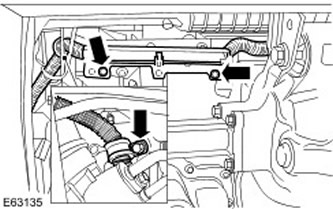
12. Remove the bolt from the accessory belt tensioner bracket.
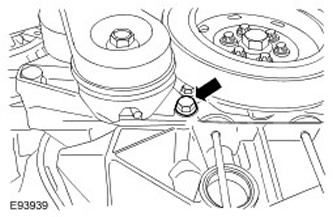
13. Remove the bottom bolt from the air conditioning compressor (A/C).
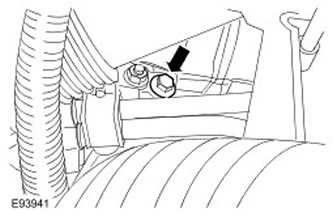
14. Release the turbocharger oil return line.
- Release the wiring harness clamp.
- Turn out a bolt.
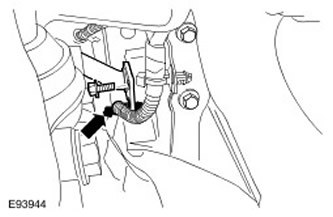
15. Remove the turbocharger oil return line.
- Turn out 2 bolts.
- Remove and discard the gasket.
- Remove and discard O-rings.
- Plug all open connections to avoid contamination of the system.
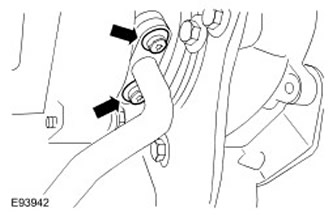
16. Remove 2 bolts from turbocharger support bracket.
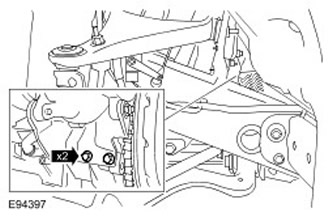
17. Turn out 3 lower bolts of fastening of a transmission to the engine.
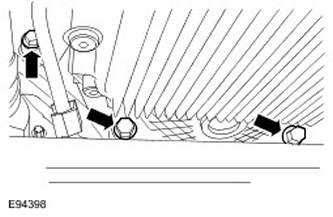
18. Remove the cross member of the front axle. Turn out 4 bolts.
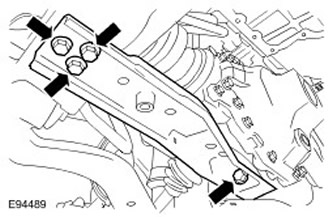
19. Using a transmission jack, support the front axle assembly.
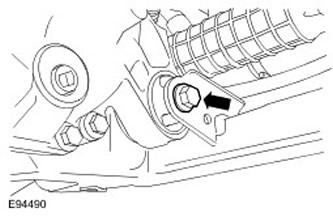
20. Turn out a forward bolt of fastening of the forward bridge. Carefully lower the front axle assembly.
21.
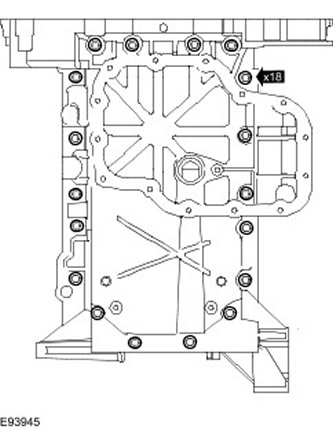
NOTE: Record the location of the bolts before removing them.
Remove the oil pan extension.
- Remove 18 bolts.
- Remove and discard the gasket.
Installation
1.
NOTE: Make sure the mating surfaces of the elements are clean.
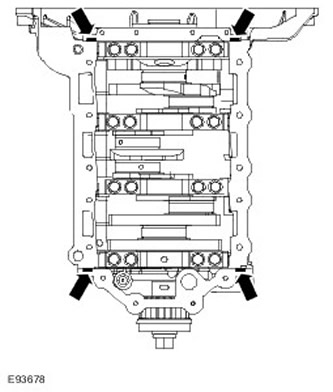
NOTE: It is important that the oil pan extension is bolted to the crankshaft main bearing housing within 20 minutes of applying the sealant.
Apply a bead of sealant with a diameter of 8 mm to the shown areas of the cylinder block. Use sealant WSS-M4G323-A4-RTV.
2. Remove the oil pan extension.
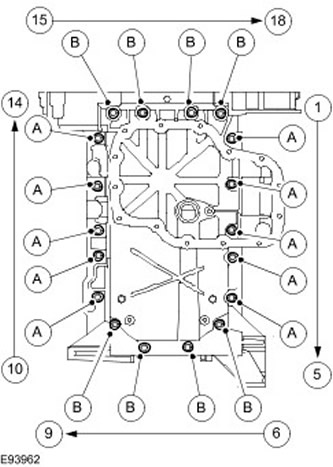
- Install a new gasket.
- Install, but do not tighten, the sump extension bolts.
- 1) Tighten bolts A (tightening torque 10 Nm). Tighten bolts B (tightening torque 4 Nm).
- 2) Tighten bolts A (tightening torque 24 Nm). Tighten bolts B (tightening torque 10 Nm).
4. Align and secure the front axle assembly. Tighten the M14 bolt (tightening torque 105 Nm).
5. Install the front axle cross member. Tighten 4 bolts to 115 Nm.
6. Screw in 3 lower bolts of fastening of a transmission to the engine. Tighten the bolts (tightening torque 45 Nm).
7. Screw 2 bolts into the turbocharger support bracket. Tighten the two bolts to 23 Nm.
8.
NOTE: Make sure the mating surfaces of the elements are clean.
NOTE: Remove and discard plugs.
Install the turbocharger oil return line.
- Install new O-rings of circular cross-section.
- Install a new gasket.
- Tighten the two bolts to 10 Nm.
10. Screw the bottom bolt into the A/C compressor. tighten bolt (tightening torque 24 Nm).
11. Screw the bolt into the accessory belt tensioner bracket. Tighten new bolt (tightening torque 24 Nm).
12. Attach the wire from the battery to the starter solenoid.
- Tighten M8 bolts (tightening torque 22 Nm).
- Tighten M6 bolts (tightening torque 10 Nm).
NOTE: Make sure the mating surfaces of the elements are clean.
Install the oil pickup tube with strainer assembly.
- Install a new sealing ring.
- Tighten the bolt to 10 Nm.
15. Remove the oil pan. For more information refer to Oil Sump (12.60.44)
16. Install the front axle tube. For more information refer to Axle tube (47.10.42)
17. Establish forward wheels in gathering with tires. Tighten the wheel nuts with a tightening torque of 140 Nm.
18.
NOTE: Make sure the mating surfaces of the elements are clean.
Attach the oil gauge tube and dipstick to the oil pan extension.
- Install a new sealing ring.
- Screw in the bolt.
20. Install the upper motor heat shield. Screw in the screw.
21. Attach a wire of weight to the accumulator. For more information refer to Specification.
Comments on this article