Removing
1. Evacuate the air conditioning system. For more information, refer to Refrigerant Recovery, Vacuuming and Charging the Air Conditioning System (A/C) (82.30.02)
2.
WARNING: It is forbidden to carry out work on a vehicle supported only by a jack. Always place secure supports under the vehicle.
Raise the car and put it on stands
3. Drain the coolant from the cooling system. For more information, refer to Draining/Filling Coolant and Bleeding the Cooling System (26.10.01)
4. Remove the driver's seat. For more information refer to Front Seat (78.10.44/99)
5. Remove the top section of the instrument panel. For more information, refer to Upper section of instrument panel (76.46.04)
6. Disconnect 3 ground wires from the bottom of the A-pillar on the driver's side. Loosen 2 nuts.
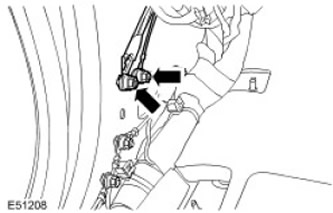
7. Disconnect the 5 electrical connectors at the bottom of the A-pillar on the driver's side.
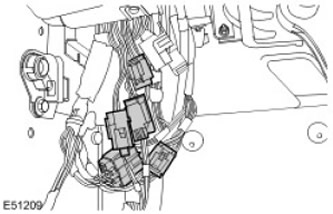
8. Disconnect 3 wires of weight from the bottom part of a forward rack of a body from outside the passenger. Loosen 2 nuts.
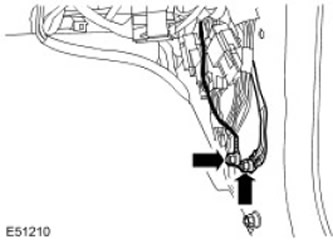
9. Disconnect an electric socket of the electric motor of a heater.
10. Disconnect the 5 electrical connectors at the bottom of the A-pillar on the passenger side.
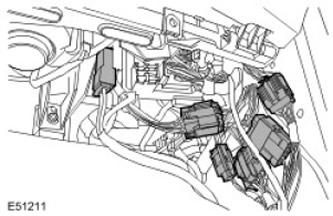
11. Disconnect the 2 electrical connectors of the central distribution block (CJB).
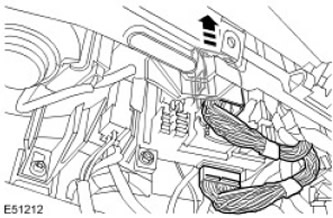
12. Disconnect 2 electric sockets from the central strengthening of the control panel.
13.
CAUTION: Cover fiber optic connections to prevent dust from entering them; Avoid bending fiber optic cables with a radius of less than 30 mm.
Disconnect the fiber optic cables from the central reinforcement of the control panel (if there). Disconnect the electrical connector.
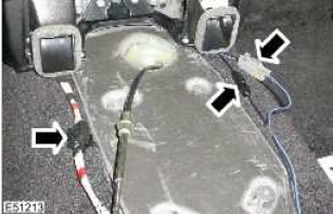
14. Install the central air ducts of the heater housing.
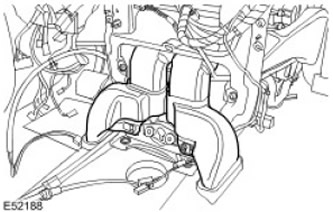
15. Disconnect an intermediate shaft of a steering column from a steering column.
- Mark the installation position.
- Unscrew the special bolt and discard the nut.
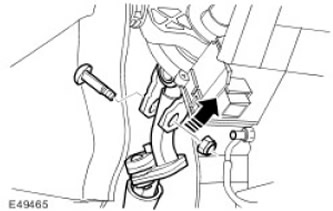
16. Disconnect the heater housing from the control panel bracket. Remove the 7 Tox screws.
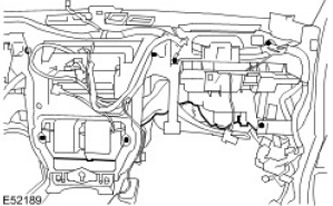
17. Remove the mixing chamber panel. For more information, refer to Storage Chamber (80.15.62)
18. Remove the Torx head bolt securing the control panel bracket to the bulkhead.
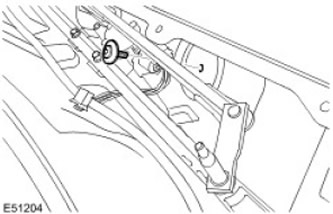
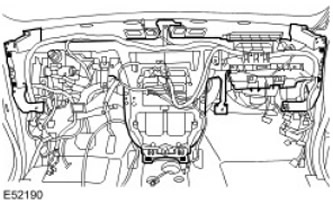
19. With assistance, remove the instrument panel. Remove 6 Tox head bolts.
20. Disconnect both hoses from the EGR coolant bypass pipe (exhaust gas recirculation). Release 2 clips.
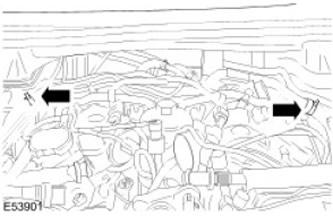
21. Remove the EGR coolant overflow pipe.
- Turn out 2 bolts.
- Release 2 clips.
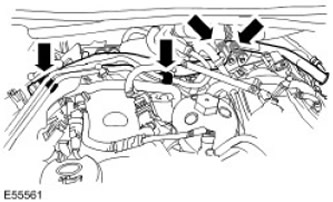
22.
CAUTION: Clean the area around the contact surfaces and connections before starting to disconnect or dismantle parts. Plug all open connections to avoid contamination of the system.
Disconnect 2 heater hoses from bulkhead. Release 2 clips.
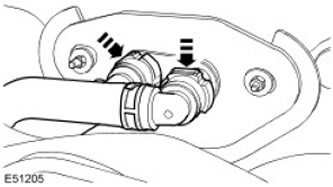
23. Disconnect 2 pipelines of the conditioner from a body. Loosen the nut.
24.
CAUTION: Plug off all refrigerant lines immediately to prevent dirt and moisture from entering.
Disconnect the 2 air conditioning pipes from the bulkhead.
- Turn out a bolt.
- Remove and discard o-rings.
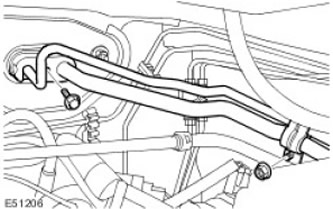
25. Remove 2 transition panels. Loosen 4 nuts.
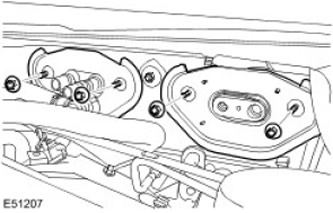
26. Disconnect two drainage tubes from the heater body.
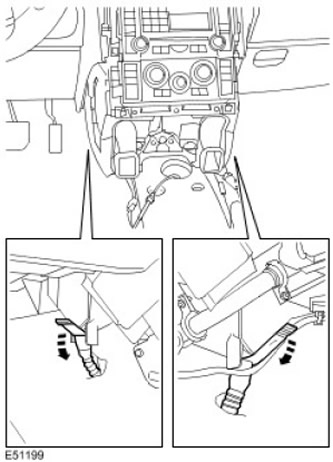
27. Remove the lower air duct from the driver's side. Remove the 2 Tox screws.
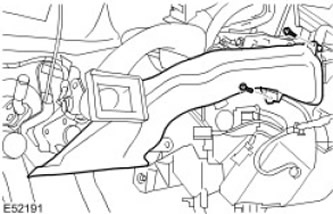
28. Remove the lower air duct on the passenger side. Remove the 2 Tox screws.
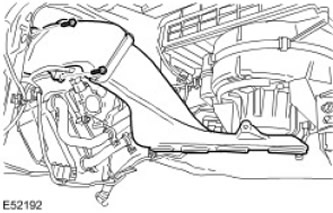
29. Driver's side: Remove the Torx head bolt securing the heater housing to the bulkhead.
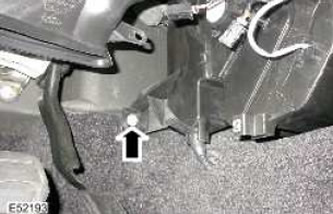
30. Passenger side: Remove the Torx head bolt securing the heater housing to the bulkhead.
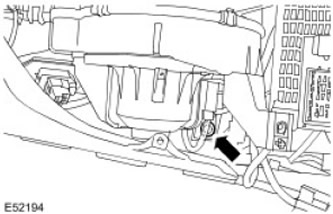
31. Remove the heater housing.
32. Disconnect the evaporator radiator temperature sensor electrical connector.
33. Release the heater core housing.
- Remove 2 screws.
- Remove 8 clips.
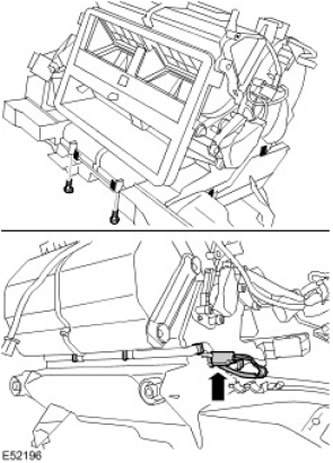
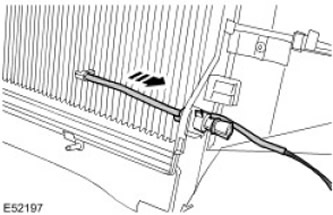
34. Remove the evaporator radiator. Disconnect the temperature sensor.
Installation
1. Install the evaporator heatsink. Attach the temperature sensor.
2. Fix the case of a radiator of a heater.
- Install clamps.
- Tighten the screws.
4. Install the heater housing.
5. On the passenger side: screw in the Torx bolt securing the heater housing to the bulkhead (tightening torque 6 Nm).
6. On the driver's side: screw in the Torx bolt securing the heater housing to the bulkhead (tightening torque 6 Nm).
7. Install the lower air ducts. Tighten the Tox cap screws.
8. Connect the drain pipes to the heater body.
9. Install transition panels. Tighten nuts (tightening torque 6 Nm).
10. Secure the air conditioning piping to the baffle.
- Clear the details.
- Install new o-rings.
- tighten bolt (tightening torque 6 Nm).
12. Attach the heater hoses to the bulkhead.
13. Install the EGR coolant overflow pipe. Tighten the bolts (tightening torque 10 Nm).
- Engage clamps.
- Connect the hoses and secure them with clamps.
15. Install the instrument panel mounting bracket to the bulkhead and secure it with a Torx head bolt (tightening torque 25 Nm).
16. Install the mixing chamber panel. For more information, refer to Storage Chamber (80.15.62)
17. Fix the heater case. Tighten the screws.
18. Attach an intermediate shaft of a steering column. Screw in the special bolt and tighten the new nut (tightening torque 22 Nm).
19. Install the central air ducts of the heater housing.
20. Connect the fiber optic cables to the central reinforcement of the control panel.
21. Connect electric sockets to the central strengthening of the control panel.
22. Connect the electrical connectors of the CJB.
23. Connect an electric socket of the electric motor of a heater.
24. Connect electric sockets on the lower part of a forward rack of a body from outside the passenger.
25. Connect the wires "masses" to the bottom of the A-pillar on the passenger side. Tighten nuts (tightening torque 10 Nm).
26. Connect electric sockets on the lower part of a forward rack of a body from outside the driver.
27. Connect ground wires to the bottom of the A-pillar on the driver's side. Tighten nuts (tightening torque 10 Nm).
28. Install the top section of the control panel. For more information, refer to Upper section of instrument panel (76.46.04)
29. Install the front seat. For more information refer to Front Seat (78.10.44/99)
30. Refill the A/C system. For more information, refer to Refrigerant Recovery, Vacuuming and Charging the Air Conditioning System (A/C) (82.30.02)
31. Fill the cooling system. For more information, refer to Draining/Filling Coolant and Bleeding the Cooling System (26.10.01)
Comments on this article