Special tool
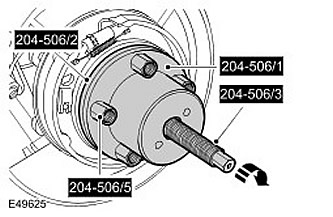
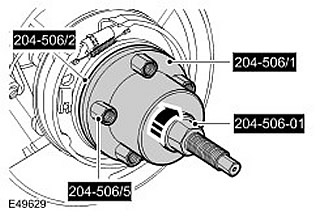
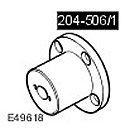 Tool for dismantling/replacing axle shafts 204-506/1 (LRT-60-030/1)
 | 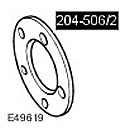 Tool for dismantling/replacing axle shafts 204-506/2 (LRT-60-030/2)
 | 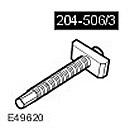 Tool for dismantling/replacing axle shafts 204-506/3 (LRT-60-030/3)
 |
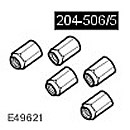 Holders - tool for dismantling/replacing axle shafts 204-506/5 (LRT-60-030/5)
 | 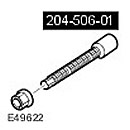 Axle mount adapter 204-506-01
 |
Removing
1.
WARNING: It is forbidden to carry out work on a vehicle standing on only one jack. Always support the vehicle with jack stands.
Raise and support the vehicle.
2. Remove the wheel.
3. Loosen the axle nut.
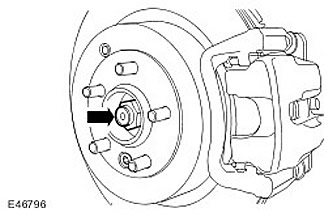
4. Remove the brake disc. For more information refer to Brake Disc (70.12.33)
5. Release the parking brake cable.
- Disconnect the parking brake cable from the brake caliper lever.
- Disconnect the parking brake cable from the brake support plate. Remove the parking brake cable from the lower arm.
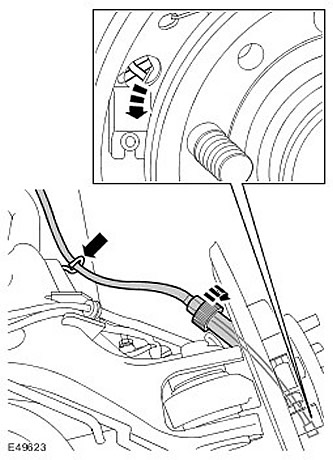
6. Disconnect the wheel speed sensor from the wheel knuckle. Turn out a bolt.
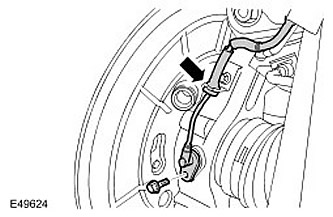
7. Disconnect the toe adjustment rod. Loosen the bolt and discard it.
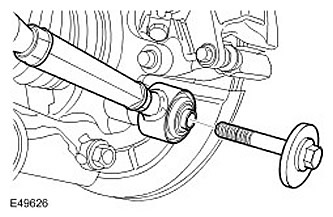
8. Loosen the axle shaft nut.
9.
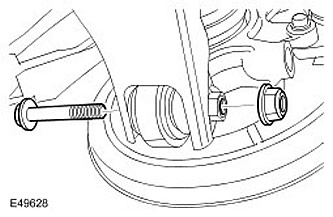
CAUTION: Make sure that the protective boot of the ball joint is not damaged. Damage to the protective cover leads to premature failure of the ball joint.
Release the wheel knuckle from the lower arm. Turn out a bolt.
10. Using the special tools, disconnect the axle shaft from the wheel hub.
11.
CAUTION: Make sure that the protective boot of the ball joint is not damaged. Damage to the protective cover leads to premature failure of the ball joint.
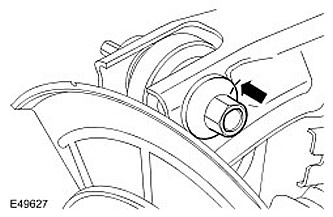
Disconnect the upper arm from the wheel knuckle.
- Make a note to remember the position of the bolt in relation to the upper arm.
- Loosen the nut and remove the bolt.
12.
CAUTION: Make sure that the protective boot of the ball joint is not damaged. Damage to the protective cover leads to premature failure of the ball joint.
Remove the wheel knuckle.
Installation
1. Clear the details.
2.
CAUTION: Make sure that the protective boot of the ball joint is not damaged. Damage to the protective cover leads to premature failure of the ball joint.
Install the wheel knuckle. Install the axle shaft.
3. Attach the upper arm to the wheel knuckle.
- Align the bolt to the mark you made earlier.
- Tighten bolt with nut (tightening torque 133 Nm).
4. Using the special tools, insert the axle shaft into the wheel hub.
5. Install a new axle nut and tighten slightly.
6.
CAUTION: Make sure that the protective boot of the ball joint is not damaged. Damage to the protective cover leads to premature failure of the ball joint.
Attach the lower arm to the wheel knuckle. Tighten bolt with nut (tightening torque 175 Nm).
7. Attach the toe adjustment rod.
- Using an M14x2 tap, clean the threads of the knuckle fixing hole. Blow out the dirt with the pneumatic line.
- Tighten the new bolt to 175 Nm.
8. Install the wheel speed sensor. Wrap the bolt (tightening torque 9 Nm).
9. Connect the parking brake cable to the brake support plate.
- Connect the parking brake cable to the brake caliper arm.
- Tighten connection (tightening torque 8 Nm).
- Attach the parking brake cable to the lower arm.
10. Install the brake disc. For more information refer to Brake Disc (70.12.33)
11. Tighten the axle nut (tightening torque 350 Nm). Fasten the nut on the axle shaft.
12. Install the wheel.
13. Adjust wheel geometry.
Comments on this article