Disassembly
CAUTION: Make sure the SWL spring compressor is sized to match or exceed the spring rate listed in the Specifications section.
1. Raise and support the vehicle.
2. Remove the wheel and tire assembly.
3. Remove shock-absorber in gathering with an elastic element. For more information, refer to Shock Absorber with Spring (64.30.11/99)
4. Install a suitable spring compressor in the vise.
5. Install the shock absorber assembly with the elastic element in the spring compressor. Compress the spring just enough to release the spring pressure.
6. Remove shock absorber.
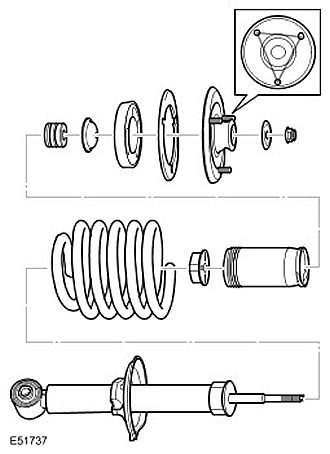
- Pinch the shock absorber axle, unscrew and discard the nut.
- Remove the top sleeve shaped spring and the top sleeve.
- Remove the top support assembly.
- Remove the dust pipe and shaped spring assembly.
- Remove the hard rubber stop.

7. Remove the spring from the spring compressor.
Assembly
1. Clean and inspect the elements for damage.
- Remove the rubber insulator.
- Remove the spacer.
- Remove the shaped spring from the dust tube.

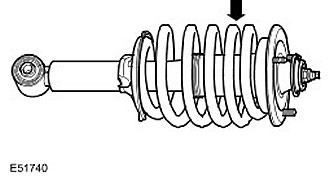
2. Install the spring into the spring compressor. Make sure the close coils of the spring are pointing towards the top of the shock.

3. Install a hard rubber stop.
4. Install the dust pipe. Install the shaped spring into the dust pipe.
5. Install shock absorber. Make sure the spring is properly seated in the spring seat.
6. Install the top support.
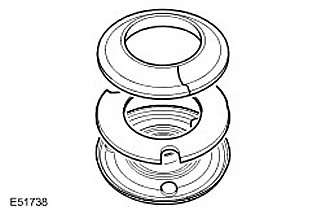
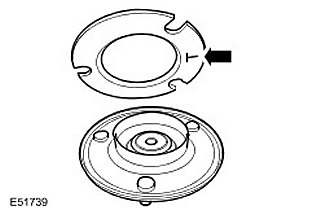
- Install spacer and rubber insulator. Make sure the pin heads fit into the notch of the spacer and do not intersect with it.
- Install the top bushing and top bushing profile spring.
- Screw in a new nut (tightening torque 98 Nm).

7. Establish the shock-absorber in gathering with an elastic element. For more information, refer to Shock Absorber with Spring (64.30.11/99)
8. Install the wheel and tire assembly. Tighten wheel nuts (tightening torque 140 Nm).
Comments on this article