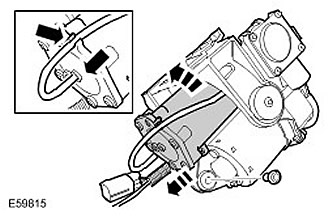
Removing
1.
WARNING: It is forbidden to carry out work on a vehicle standing on only one jack. Always support the vehicle with jack stands.
Raise and support the vehicle.
2. Remove the air suspension air compressor. For more information refer to Air Suspension Compressor (60.50.10)
3.
CAUTION: Make sure the area around the contact surfaces is clean and dry before you start to disconnect or remove parts. Plug all open connections to avoid contamination of the system.
Disconnect the air lines from the air suspension air compressor dryer. Release the air line from the latch.
4.
NOTE: Note the position of the air suspension air compressor fixing cable (if the car is equipped with a fixing cable).
Remove the air suspension air compressor dryer.
- Remove the screw.
- Remove the O-ring and discard it.

Installation
1. Install a new sealing ring. Lubricate the O-ring with grease thickened with lithium soaps.
2.
NOTE: If the vehicle is equipped with an air suspension air compressor retaining cable, make sure it is properly routed around the air compressor cylinder head.
Install the air suspension air compressor dryer.
3.
CAUTION: Visually inspect air line ends for damage or wear. Replace air line if necessary.
CAUTION: Pull on the air line to make sure it is securely seated in the coupler.
Connect the air line to the air suspension compressor dryer. Insert the air line into the latch of the latch.
4. Install the air suspension air compressor. For more information refer to Air Suspension Compressor (60.50.10)
Comments on this article