Removing
WARNING: When dismantling the outer parts, always protect the paintwork and glass from damage.
ATTENTION: When dismantling the glass, always protect the interior trim parts from damage.
CAUTION: Place the glass on a felt-covered stand. Do not place the glass on its edge, as this may cause damage to the edge, which subsequently develops into cracks.
NOTE: You will need the following equipment: l Cutting wire with handles l Straight knife l Glazier's knife l Windshield replacement kit l Sealant gun l Suction cups l Felt-lined table or glass stand.
1. Install the rear window wiper arm. For more information, refer to Rear Wiper Arm (84.35.01)
2. Remove the rear window wiper spindle seal.
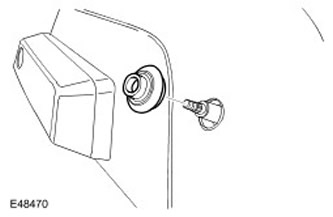
3. Remove the bottom panel of furnish of a door of a luggage compartment. For more information, refer to Tailgate Trim Panel (76.34.11)
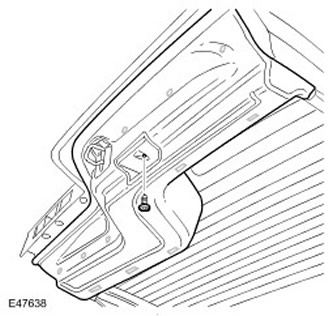
4. Remove the top panel of furnish of a door of a luggage space. Release 4 clips.
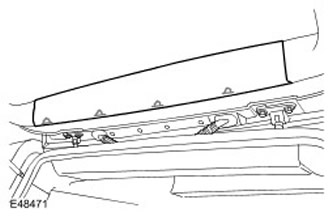
5. Remove the tailgate trim side panel.
- Release 4 clips.
- Repeat the above procedure on the other side.
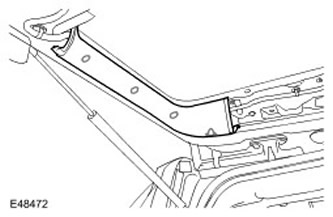
6. Connect both electric sockets of heating of back glass.
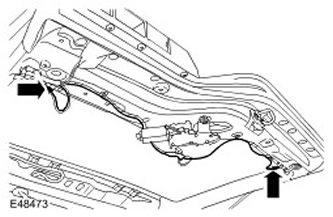
7.
WARNING: Be sure to use protective goggles.
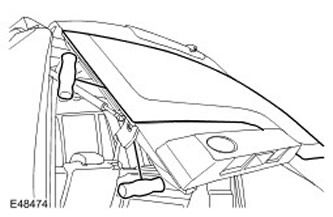
With assistance, remove the tailgate glass.
- Using a glazier's knife or cutting wire, carefully cut off the sealant.
- Install suction cups.
- Remove the 5 spacers, noting in which position they were installed.
Installation
1. Carefully remove the sealant from the body to create a smooth surface.
2. Install the tailgate glass.
- Install the spacers at the same distance as shown.
- To simplify subsequent installation, stick labels from masking tape.
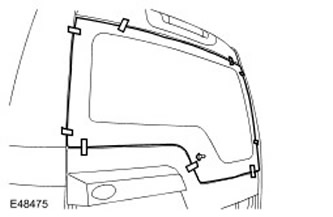
3. Remove glass of a door of a luggage space. Clean the contact surfaces of the parts.
4. Apply a pickling primer to a clean metal surface.
5. Apply primer to pickling primer.
6. Apply a glass primer to the surface of the tailgate glass seal and allow it to dry.
7. Apply an activating compound to the old tailgate glass seal and allow it to dry.
8. Install the orifice on the caulk cartridge, remove the cap, shake out the solids and install the cartridge on the caulk gun. Adjust the nozzle so that you get a bead of sealant with a rectangular triangle in cross section, having a base of 8 mm and a height of 12 mm.
9. Apply a continuous bead of sealant to the tailgate glass as shown.
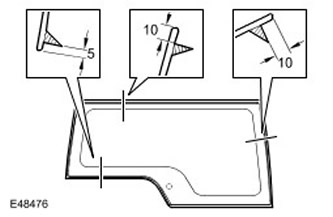
10. With assistance, install and align the tailgate glass. Lightly press the window glass against the sealant.
11. Check the tightness of the connection, apply additional sealant if necessary. If water is used for testing, do not test until the sealant has cured. Point a jet of water at the glass and check for leaks. Mark the location of the leak. Dry the glass and sealant, then apply additional sealant.
12. Connect electric connectors of heating of back glass.
13. Establish the side panel of furnish of a door of a luggage space.
- Engage clamps.
- Repeat the above procedure on the other side.
15. Establish the bottom panel of furnish of a door of a luggage space. For more information, refer to Tailgate Trim Panel (76.34.11)
16. Install the rear window wiper spindle seal.
17. Establish the lever of a cleaner of back glass. For more information, refer to Rear Wiper Arm (84.35.01)
Comments on this article