Removing
1.
WARNING: It is forbidden to carry out work on a vehicle standing on only one jack. Always support the vehicle with jack stands.
Raise the car and place stands under it.
2. Disconnect the wire "masses" from the battery.
For more information, see the chapter: Disconnecting and connecting the battery (414-01 Battery, Battery Mount and Wires, General Procedures).
3. Remove the flywheel.
For more information, see chapter: Flywheel (303-01 Engine - Diesel engine ID4 2.4L, Car repair).
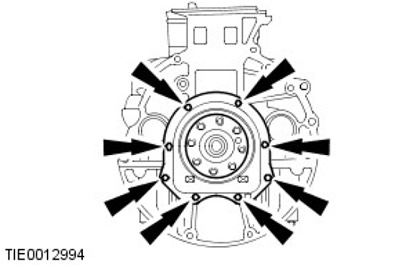
4. Remove and discard the crankshaft rear oil seal. Remove and discard 8 bolts.

Installation
1.
CAUTION: A new crankshaft rear oil seal has a locating sleeve that should not be removed until the crankshaft rear oil seal is fully installed. Failure to do so may result in vehicle damage.
NOTE: Clean the contact surfaces of the parts.
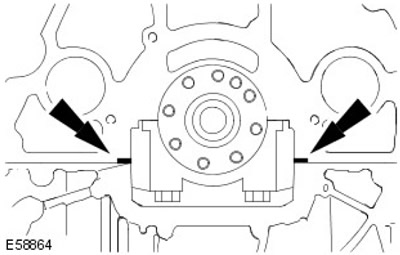
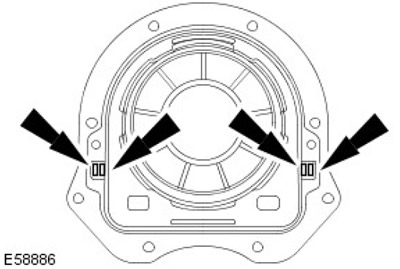
Ensure that the two foam pads are positioned on the step frame spacer as shown.
- If there are protrusions on the step frame gasket, align them with the cylinder block and step frame using a suitable tool.
- Apply a thin layer of sealant to the indicated areas.

2.
Caveats:
- Install a new crankshaft rear oil seal within 5 minutes of applying the recommended sealant.
- Apply sealant only to the specified surface.
Completely seal the surfaces shown with the recommended sealant.
For more information, please refer to the chapter: Specifications (303-01 Engine -Diesel engine ID4 2.4L, Specifications).

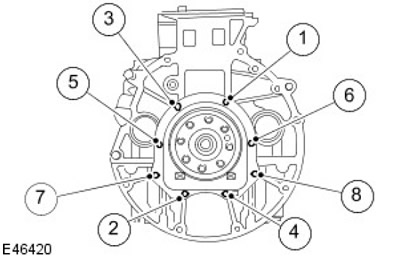
3. Establish a back epiploon of a cranked shaft. Tighten the bolts in sequence to 10 Nm.

4. Remove and discard the crankshaft rear oil seal locating sleeve.
5. Install the flywheel.
For more information, see chapter: Flywheel (303-01 Engine - Diesel engine ID4 2.4L, Car repair).
6. Connect the wire "masses" to the battery.
For more information, see the chapter: Connecting the Battery (414-01 Battery, Battery Mount and Wires, General Procedures).
Comments on this article