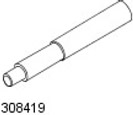
Special tool (s)
 | Clutch adjustment tool. 308-419 |
Removing
1.
WARNING: It is forbidden to carry out work on a vehicle standing on only one jack. Always support the vehicle with jack stands.
Raise the car and place stands under it.
2. Disconnect the wire "masses" from the battery.
For more information, see the chapter: Disconnecting and connecting the battery (414-01 Battery, Battery Mount and Wires, General Procedures).
3. Remove a transmission in the block with the leading bridge.
For more information, see the chapter: Gearbox (308-03 Manual transmission / transmission in a block with a driving axle, Removal).
4.
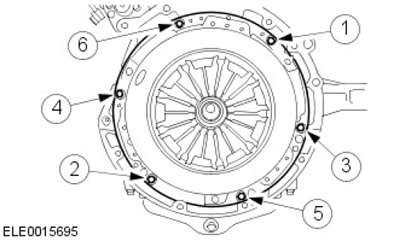
CAUTION: Loosen the clutch pressure plate bolts by backing out two turns at a time in the sequence shown. Failure to do so may result in vehicle damage.
Remove the driven and pressure plates of the clutch. Remove and discard 6 bolts.

Installation
1.
Caveats:
- Use new bolts. Failure to do so may result in vehicle damage.
- Apply the recommended type of grease to the pilot bearing. Failure to do so may result in vehicle damage.
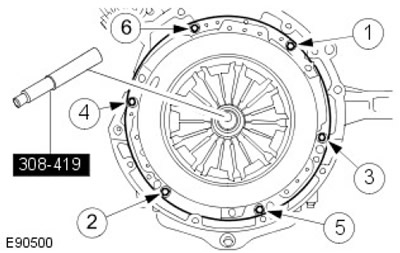
- Tighten the bolts in the order shown in the figure. Failure to do so may result in vehicle damage.
NOTE: Clean the contact surfaces of the parts.
Using the special tool, install the clutch disc and pressure plate. Tighten the bolts (tightening torque 29 Nm).

2. Remove special tools.
3. Install the gearbox in the block with the drive axle.
For more information, see the chapter: Gearbox (308-03 Manual Transmission / Transaxle Transmission, Installation).
4. Connect the wire "masses" to the battery.
For more information, see the chapter: Connecting the Battery (414-01 Battery, Battery Mount and Wires, General Procedures).
Comments on this article