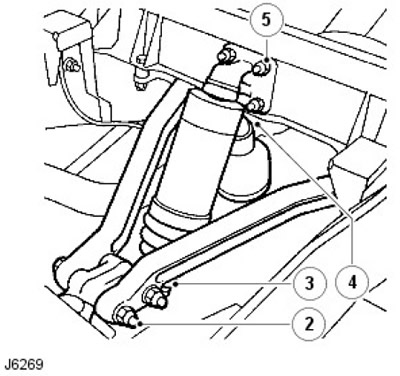
Removing
WARNING: The self-levelling block contains pressurized gas and must NOT be disassembled. Only repair by replacing the complete unit is possible.
NOTE: This procedure covers the Self Leveling Suspension Assembly.
1. Raise and support the vehicle under the chassis, use a jack to support the axle.
2. Detach the upper arms on the swing arm.
3. Loosen the bottom boot of the self leveling suspension unit and unscrew the bottom ball joint at the pushrod area using a double jaw wrench.
4. Disconnect the clamp from the chassis.
5. Remove the 4 nuts securing the top bracket to the chassis and disconnect the self-levelling suspension assembly with the bracket.

6. Replace the ball joints of the self leveling suspension unit.
7. Remove the lower ball joint from the re-bracket.
8. Remove the ball joint from the top bracket.
9. Assemble ball joints, lubricate with Dextagrease GP or equivalent grease. If the hinges are worn, replace them.
10. Check up a condition of covers and if it is necessary, replace them.
Installation
1. Make sure the ball stud threads are clean and apply Loctite CVX/
2. Install the top ball joint on the self leveling suspension unit and secure the boot.
3. Install the upper bracket assembly with the self-levelling suspension unit on the chassis, fix with 4 nuts and tighten with a torque of 47 Nm (35 lb-ft/ft).
4. Place the self-levelling suspension assembly on the lower ball joint and secure the boot.
5. Attach the clamp to the chassis cross member.
6. Mount the upper arms to the swing arm and secure with 2 bolts and nuts, but do not tighten at this stage.
7. Remove the jack on which the axle rests and the support from under the chassis.
8. Allow the suspension to stabilize, then tighten the 2 bolts and nuts securing the upper arms to the swing arm to 176 Nm (130 lb-ft/lb).
Comments on this article